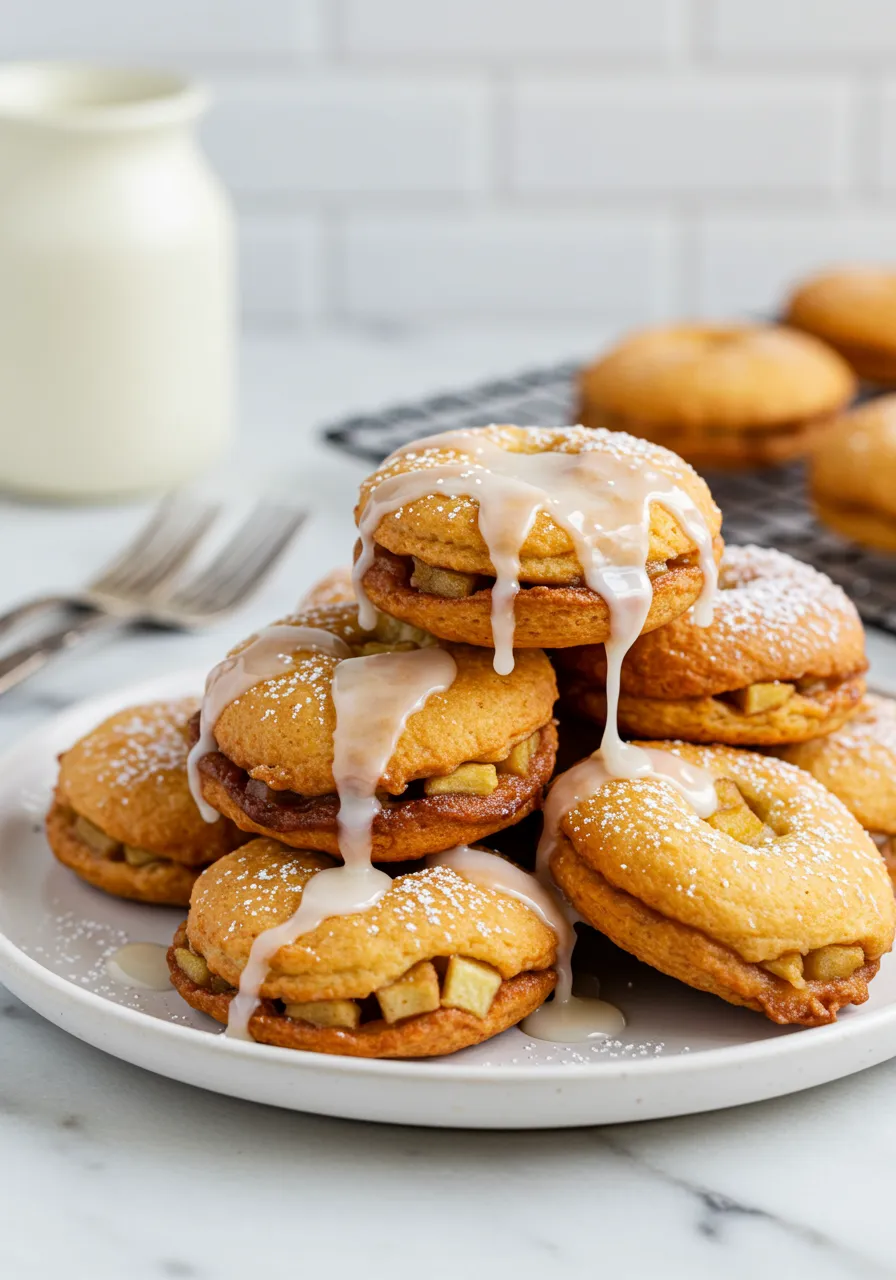
Oh, the sweet, comforting aroma of apple fritters! Growing up, they felt like a special treat, usually involving a trip to a bakery or a local fair. There’s something undeniably nostalgic about biting into that warm, apple-filled goodness. But let’s be honest, the traditional deep-fried version, while delicious, isn’t exactly an everyday indulgence. That’s where this baked apple fritter recipe comes in!
In This Post
Why You’ll Love This Baked Apple Fritter Recipe
If you’re looking for a way to enjoy classic apple fritter flavor with less guilt and more ease, this recipe is for you. Here’s why I think you’ll fall in love with these baked beauties:
- Significantly Healthier: By baking instead of frying, we cut down on a significant amount of oil and fat.
- Easier Clean-Up: No splattering oil means a much cleaner kitchen!
- Less Intimidating: Frying can feel daunting. Baking is simple – just scoop and bake!
- Quick to Make: Prep is fast, and baking takes less time than frying batches.
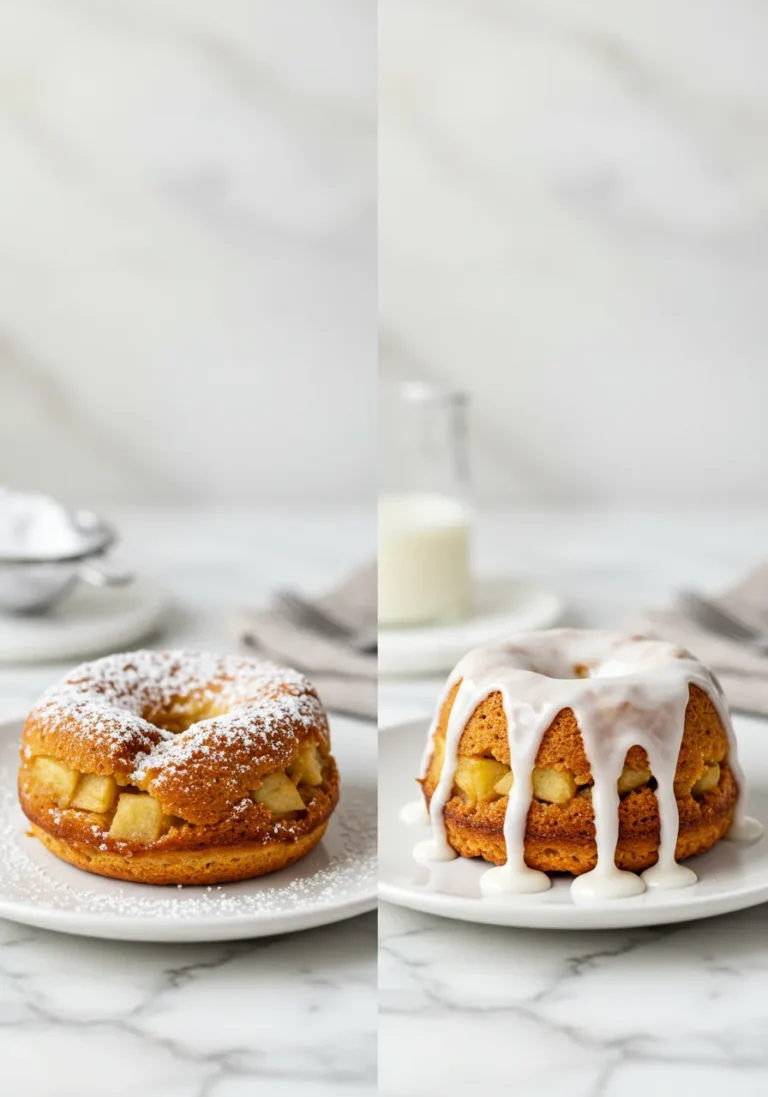
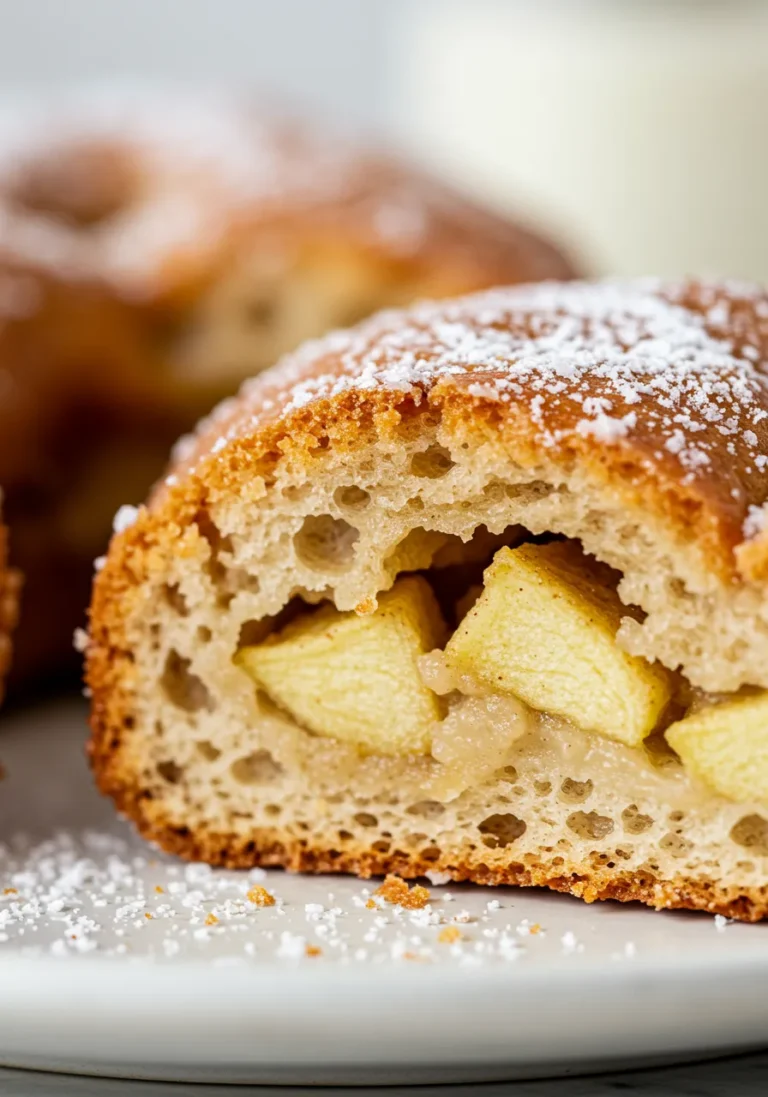
- Perfect Texture: They have a wonderfully tender, cake-like interior with soft, sweet apple chunks.
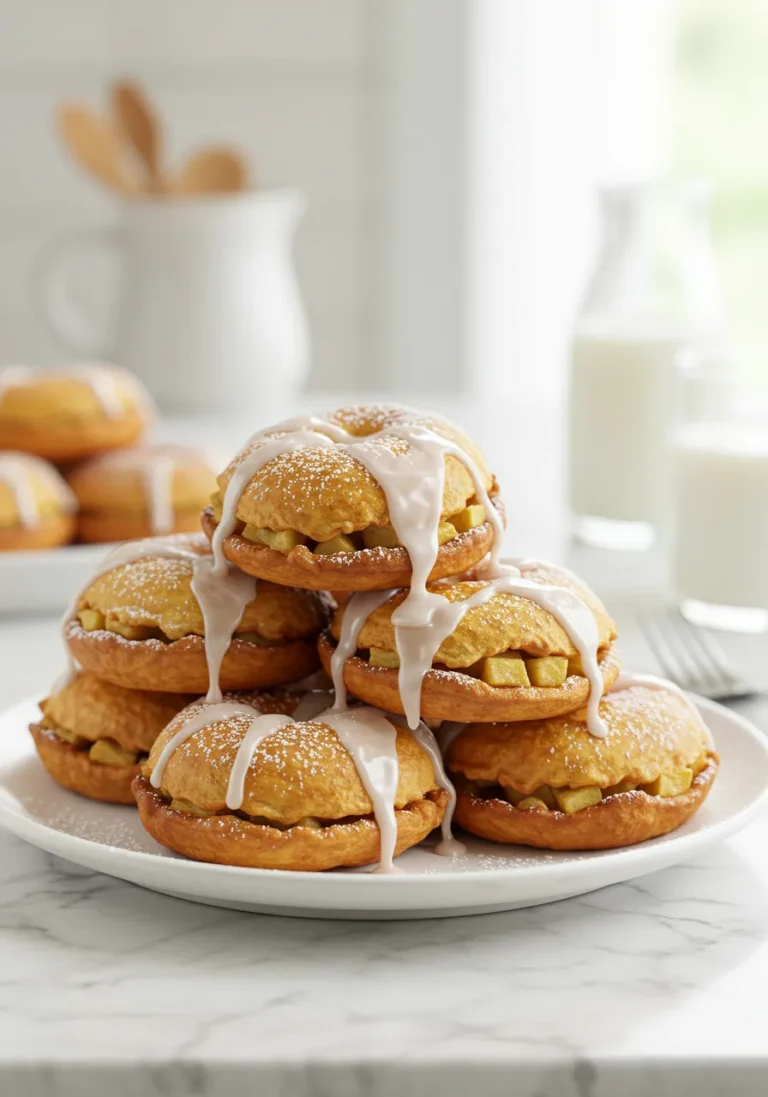
- Full of Flavor: All the classic cinnamon-apple goodness you expect, plus that essential sweet glaze.
- Cozy & Comforting: The perfect treat for a crisp morning or a cozy afternoon.
Baked Apple Fritter Ingredients
What You’ll Need
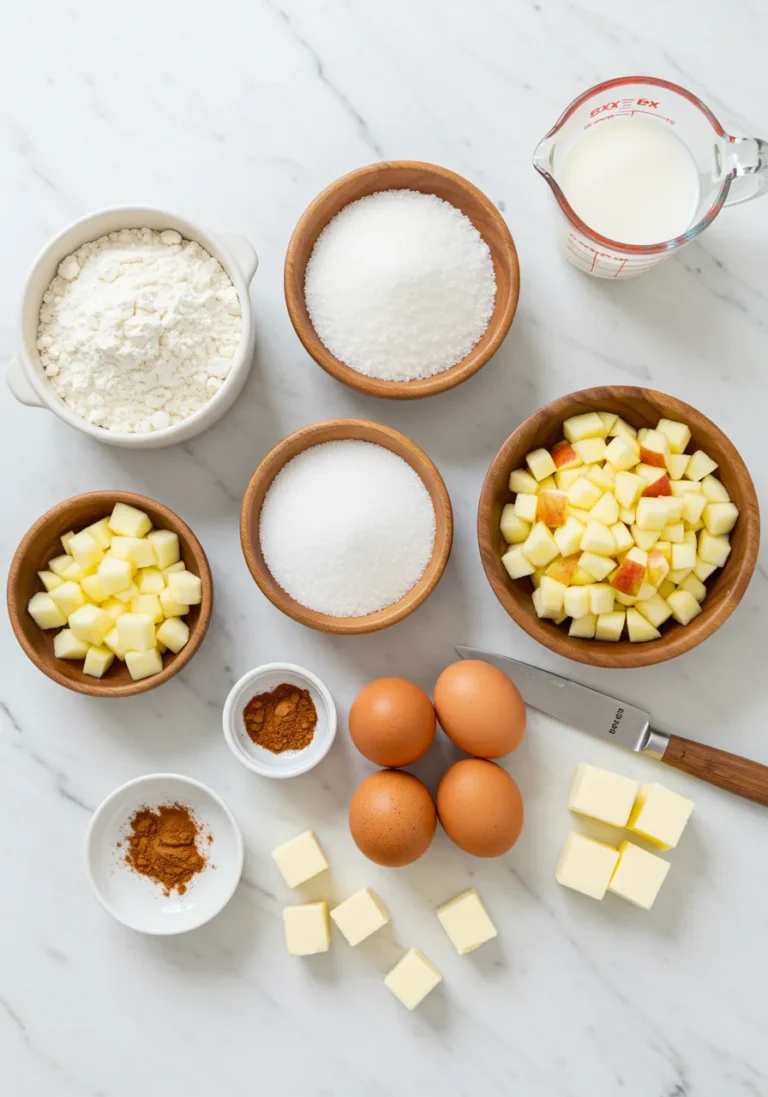
Gathering your ingredients is the first step to baking happiness! Here’s everything you’ll need for these delightful baked apple fritters. Precise measurements ensure the best results, so grab your measuring cups and spoons!
- For the Fritters:
- 2 cups all-purpose flour (measured correctly – spooned and leveled)
- ⅔ cup granulated sugar
- 2 teaspoons baking powder (for lift!)
- ½ teaspoon baking soda (helps with browning and texture)
- 1 teaspoon ground cinnamon
- ½ teaspoon ground nutmeg (freshly grated if possible!)
- ¼ teaspoon salt (fine sea salt is my favorite)
- 1 large egg (room temperature is best)
- ¾ cup milk (any kind, dairy or non-dairy)
- ¼ cup unsalted butter, melted and slightly cooled
- 1 teaspoon vanilla extract (pure vanilla for best flavor)
- 2 cups diced apples (about 2 medium-sized apples, peeled, cored, and diced into ½-inch pieces)
- For the Glaze:
- 1 ½ cups powdered sugar (confectioners’ sugar)
- 2-3 tablespoons milk (or apple cider, or even lemon juice for a zing!)
- ½ teaspoon vanilla extract
Smart Swaps & Flavor Boosts
This recipe is forgiving and easy to adapt! Here are a few ways you can customize your baked apple fritters:
- Gluten-Free: Swap the all-purpose flour for a 1-to-1 gluten-free baking blend. Make sure it contains xanthan gum for structure.
- Dairy-Free/Vegan: Use a plant-based milk (like almond, soy, or oat) and swap the butter for melted vegan butter or coconut oil. Ensure your baking powder/soda are fresh.
- Different Fruit: Not an apple fan? Try diced pears, peaches, or even berries (though berries can add more moisture, so use slightly less).
- Spice It Up: Add a pinch of ground ginger or cardamom alongside the cinnamon and nutmeg for extra warmth.
- Texture Boost: Fold in ¼ cup of chopped walnuts or pecans with the apples for a lovely crunch.
- For Extra Richness: Try using browned butter instead of simply melted butter for the fritter batter. Browned butter adds a wonderful nutty depth of flavor that complements the apples perfectly. Just melt the butter in a saucepan over medium heat, swirl occasionally until it turns golden brown and smells nutty, then let it cool slightly before adding to the batter.
Ingredient Notes & Sourcing
Choosing the right ingredients makes a difference! Here are a few tips:
- Apples: I recommend using firm, slightly tart or balanced varieties that hold their shape when baked, like Granny Smith, Honeycrisp, Fuji, or Gala. Avoid mushy apples like Red Delicious. Dice them small enough (around ½ inch) so they soften nicely within the baking time but not so small they disappear.
- Flour: Spoon your flour into the measuring cup and level it off with a straight edge (like a knife). Scooping directly from the bag can compact the flour and lead to too much flour, resulting in dry fritters.
- Room Temperature Egg: A room temperature egg incorporates more evenly into the batter, creating a smoother texture. If you forget to take it out ahead of time, place the egg in a bowl of warm water for 5-10 minutes.
- Spices: Use fresh spices! Ground spices lose potency over time. Give them a sniff – if they don’t smell strongly fragrant, it’s time for new ones.
- Storing Apples: Keep apples in the crisper drawer of your refrigerator to keep them fresh and crisp longer.
Essential Equipment
You don’t need fancy gadgets for these, just a few kitchen basics will do the trick! Having the right tools makes the process smoother and helps ensure lovely baked apple fritters every time.
- Two Medium to Large Mixing Bowls: One for the dry ingredients, one for the wet, and then combining. Essential for keeping your workspace organized.
- Whisk: For combining the dry ingredients and then whisking the wet ingredients together. A whisk helps incorporate air for lighter results in the batter.
- Rubber Spatula or Wooden Spoon: For folding the dry ingredients into the wet and incorporating the apples without overmixing.
- Measuring Cups and Spoons: Accuracy is key in baking!
- Apple Peeler, Corer, and Knife: For preparing the apples quickly and safely. No apple peeler? A sharp paring knife works too. No corer? Carefully cut around the core.
- Large Baking Sheets: You’ll likely need two, or bake in batches, as you don’t want to crowd the fritters. Crowding prevents them from baking evenly.
- Parchment Paper or Silicone Baking Mats: Absolutely essential for preventing sticking and making clean-up a breeze. I always recommend using parchment paper!
- Wire Cooling Rack: For cooling the fritters before glazing and allowing the glaze to set without getting a soggy bottom.
- Small Bowl: For whisking the glaze ingredients together.
See? Nothing too specialized! Even if you don’t have a wire rack, you can cool them on the baking sheet (though the bottom might get slightly soft from residual heat). Baking them on parchment paper is the most important equipment tip here!
Crafting Your Baked Apple Fritter: Step-by-Step
Let’s turn those simple ingredients into delicious baked apple fritters! The process is straightforward: you’ll mix the dry ingredients, mix the wet ingredients, combine them with the diced apples, and then bake until golden brown and wonderful. It’s much simpler than dealing with hot oil!
Prep time: 15 minutes | Cook time: 18-22 minutes | Total time: 35-40 minutes (plus cooling)
- Prepare Your Workspace & Oven: Preheat your oven to 375°F (190°C). Line one or two large baking sheets with parchment paper. This prevents sticking and ensures easy removal.
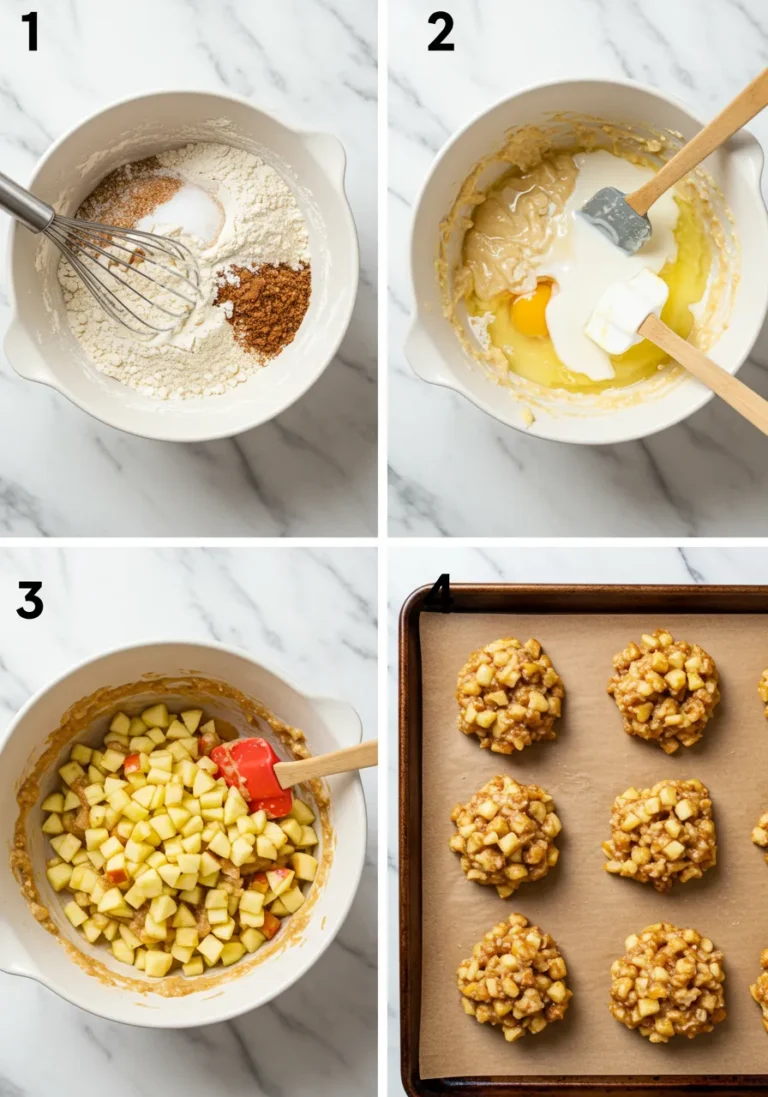
- Combine Dry Ingredients: In a large mixing bowl, whisk together the all-purpose flour, granulated sugar, baking powder, baking soda, ground cinnamon, ground nutmeg, and salt. Whisking ensures the leavening agents and spices are evenly distributed, which is crucial for even rising and flavor.
- Combine Wet Ingredients: In a separate medium bowl, whisk together the large egg, milk, melted butter, and vanilla extract until well combined and smooth.
- Add Wet to Dry: Pour the wet ingredients into the bowl with the dry ingredients. Using a rubber spatula or wooden spoon, gently mix just until *almost* combined. The batter will be thick and lumpy, and that’s okay! Do not overmix, as this develops gluten and can result in tough fritters. A few dry streaks are fine at this stage.
- Fold in Apples: Add the diced apples to the batter. Gently fold them in until they are evenly distributed throughout the batter. The batter will be very thick, more like a drop biscuit dough or scone dough consistency rather than a pourable batter.
- Scoop the Fritters: Using two spoons or a medium cookie scoop (about 2-3 tablespoons), drop irregular mounds of batter onto the prepared baking sheets. Leave about 2 inches of space between each fritter to allow for spreading and even baking. Aim for roughly 12-15 fritters depending on size. Don’t worry about making them look perfectly round; the irregular shapes give them that classic “fritter” look!
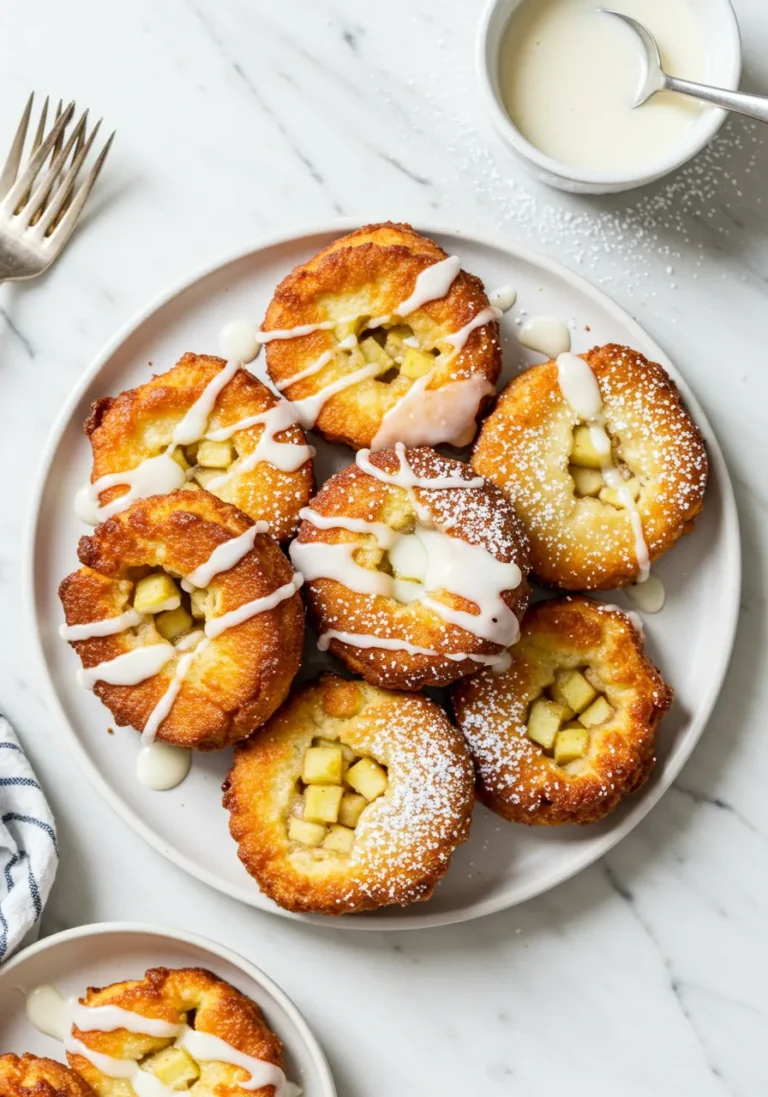
- Bake Until Golden: Bake in the preheated oven for 18-22 minutes, or until the fritters are puffed up, golden brown on the edges and bottom, and a toothpick inserted into the center comes out clean (avoiding an apple piece). Baking time can vary depending on your oven and the size of your fritters.
- Cool Slightly: Carefully transfer the baked fritters from the baking sheets to a wire cooling rack using a spatula. Let them cool for at least 10-15 minutes before glazing. This allows them to firm up and prevents the glaze from melting entirely.
- Make the Glaze: While the fritters are cooling, whisk together the powdered sugar, milk (or liquid of choice), and vanilla extract in a small bowl until smooth and pourable. If it’s too thick, add a tiny bit more liquid (¼ teaspoon at a time). If too thin, whisk in a little more powdered sugar.
- Glaze the Fritters: Once the fritters have cooled slightly, you can dip the tops into the glaze, or drizzle the glaze generously over each fritter using a spoon or whisk. Let the glazed fritters sit on the wire rack for another 10-15 minutes to allow the glaze to set before serving.
Ensuring Perfection: Pro Tips & Troubleshooting
Even simple recipes have little secrets that make them shine! Here are my best tips for getting perfect baked apple fritters every time, along with how to fix common hiccups.
- The Secret to Tender Fritters: Don’t Overmix! This is the golden rule of muffin, scone, and fritter batters. Mixing the wet and dry ingredients just until *barely* combined (a few dry streaks are fine) prevents gluten development. Overmixing leads to tough, dense fritters. Handle the batter gently.
- Dice Those Apples Just Right: Aim for ½-inch pieces. If they are too large, they might not soften adequately during the short baking time. If they are too small, they can become mushy or dissolve into the batter. Consistency helps them bake evenly.
- Bake Them on Parchment Paper: I cannot stress this enough! Not only does it prevent sticking (baked batter is sticky!), but it also helps the bottoms brown nicely and makes cleanup incredibly easy. Silicone mats work well too.
- Give Them Space: Don’t overcrowd the baking sheet. Leave enough room (about 2 inches) between each fritter. This allows hot air to circulate, helping them bake evenly and develop a lovely golden color all around. If crowded, they will steam instead of bake, resulting in pale, soft sides.
- Cool Before Glazing: Glazing hot fritters will result in a thin, runny glaze that mostly melts off. Letting them cool for 10-15 minutes allows them to firm up and the glaze to set into that lovely, slightly crusty layer we all adore.
Common Pitfalls & How to Sidestep Them:
- Fritters are Flat or Don’t Rise Well:
- Issue: Leavening agents (baking powder/soda) might be old.
- Fix: Check the expiration dates! Test baking powder by adding a spoonful to hot water – it should bubble vigorously. Test baking soda by adding a spoonful to vinegar – it should fizz instantly.
- Issue: Batter was overmixed.
- Fix: Gently fold ingredients just until combined next time.
- Issue: Too much moisture (wet apples, wrong liquid ratio).
- Fix: Ensure apples are diced, not shredded. Measure liquids precisely.
- Fritters are Burnt Outside, Raw Inside:
- Issue: Oven too hot, or baking time too short for the size.
- Fix: Use an oven thermometer to verify temperature accuracy. If using a convection oven, you might need to reduce the temperature slightly (25°F/15°C). Ensure fritters are a consistent size. Bake until a toothpick comes out clean.
- Glaze is Too Runny or Too Thick:
- Issue: Incorrect liquid/sugar ratio.
- Fix: Gradually add more powdered sugar if too thin, or more liquid (¼ teaspoon at a time) if too thick, whisking well after each addition until you reach the desired consistency.
Technique Spotlight: Folding Gently. When adding the wet to the dry ingredients and then the apples, think “folding” rather than “stirring” or “beating.” Use the spatula to scoop from the bottom of the bowl and turn it over the top. This incorporates the ingredients without overworking the batter. It’s a simple technique that makes a big difference!
Variations & Creative Twists
Once you’ve mastered the basic baked apple fritter, feel free to play around and make them your own! Here are some ideas to get you started:
- Dietary Variations:
- Gluten-Free: As mentioned above, use a GF blend.
- Dairy-Free/Vegan: Use plant-based alternatives.
- Lower Sugar: Reduce the sugar in the batter slightly (be mindful it affects texture). Use a lighter glaze or a dusting of cinnamon sugar instead of a full glaze.
- Spice It Up/Down:
- Add a pinch of ground cardamom or ginger.
- Use apple pie spice mix instead of just cinnamon and nutmeg.
- For a spicier kick, add a tiny pinch of cayenne pepper to the batter – sounds weird, but it enhances the sweet and spicy notes!
- Gourmet Twists:
- Add a tablespoon of Calvados or apple brandy to the apple mixture before folding into the batter (optional, for adults).
- Use browned butter in the batter for a nutty flavor boost.
- Add finely grated orange or lemon zest to the batter for a bright note.
- Make a maple glaze instead of a plain sugar glaze by swapping some of the milk for pure maple syrup.
- Drizzle with warm caramel sauce or a cream cheese glaze instead of the simple powdered sugar glaze.
- Simplify It:
- Use pre-diced apples if available (though fresh is best for texture).
- Skip the glaze entirely and just dust them with powdered sugar or cinnamon sugar while warm.
- Seasonal Swaps:
- Use diced pears in the fall.
- In summer, try diced peaches or even firm berries mixed with a little flour to absorb extra moisture.
- Try sweet potato or pumpkin puree (reduce liquid in batter slightly) with pumpkin pie spice for a fall twist.
Printable Recipe Card

Easy & Healthier Baked Apple Fritters
Equipment
- 2 Mixing Bowls Medium to large
- 1 Whisk
- 1 Rubber Spatula or wooden spoon
- 1 Measuring Cups and Spoons
- 1 Apple Peeler Optional, but helpful
- 1 Apple Corer Optional, but helpful
- 1 Knife For dicing apples
- 2 Baking Sheets Large
- 1 Parchment Paper or silicone baking mats
- 1 Wire Cooling Rack
- 1 Small Bowl For glaze
Ingredients
- 2 cups All-purpose flour spooned and leveled
- ⅔ cup Granulated sugar
- 2 teaspoons Baking powder
- ½ teaspoon Baking soda
- 1 teaspoon Ground cinnamon
- ½ teaspoon Ground nutmeg
- ¼ teaspoon Salt fine sea salt
- 1 large Egg room temperature
- ¾ cup Milk any kind
- ¼ cup Unsalted butter melted and slightly cooled
- 1 teaspoon Vanilla extract
- 2 cups Diced apples about 2 medium, peeled, cored, ½-inch pieces
- 1 ½ cups Powdered sugar
- 2-3 tablespoons Milk or apple cider/lemon juice
- ½ teaspoon Vanilla extract
Instructions
- Preheat your oven to 375°F (190°C). Line one or two large baking sheets with parchment paper. This prevents sticking and ensures easy removal.
- In a large mixing bowl, whisk together the all-purpose flour, granulated sugar, baking powder, baking soda, ground cinnamon, ground nutmeg, and salt. Whisking ensures the leavening agents and spices are evenly distributed, which is crucial for even rising and flavor.
- In a separate medium bowl, whisk together the large egg, milk, melted butter, and vanilla extract until well combined and smooth.
- Pour the wet ingredients into the bowl with the dry ingredients. Using a rubber spatula or wooden spoon, gently mix just until *almost* combined. The batter will be thick and lumpy, and that’s okay! Do not overmix, as this develops gluten and can result in tough fritters. A few dry streaks are fine at this stage.
- Add the diced apples to the batter. Gently fold them in until they are evenly distributed throughout the batter. The batter will be very thick, more like a drop biscuit dough or scone dough consistency rather than a pourable batter.
- Using two spoons or a medium cookie scoop (about 2-3 tablespoons), drop irregular mounds of batter onto the prepared baking sheets. Leave about 2 inches of space between each fritter to allow for spreading and even baking. Aim for roughly 12-15 fritters depending on size. Don’t worry about making them look perfectly round; the irregular shapes give them that classic “fritter” look!
- Bake in the preheated oven for 18-22 minutes, or until the fritters are puffed up, golden brown on the edges and bottom, and a toothpick inserted into the center comes out clean (avoiding an apple piece). Baking time can vary depending on your oven and the size of your fritters.
- Carefully transfer the baked fritters from the baking sheets to a wire cooling rack using a spatula. Let them cool for at least 10-15 minutes before glazing. This allows them to firm up and prevents the glaze from melting entirely.
- While the fritters are cooling, whisk together the powdered sugar, milk (or liquid of choice), and vanilla extract in a small bowl until smooth and pourable. If it’s too thick, add a tiny bit more liquid (¼ teaspoon at a time). If too thin, whisk in a little more powdered sugar.
- Once the fritters have cooled slightly, you can dip the tops into the glaze, or drizzle the glaze generously over each fritter using a spoon or whisk. Let the glazed fritters sit on the wire rack for another 10-15 minutes to allow the glaze to set before serving.
Notes
Serving & Pairing Suggestions
These baked apple fritters are best served warm, ideally with the glaze still slightly soft or just set. They are a treat on their own, but a few additions can elevate the experience!
- For Breakfast or Brunch: Serve alongside coffee, tea, or a glass of milk. They pair wonderfully with a simple fruit salad or yogurt for a more complete meal.
- As a Dessert: Enjoy them warm with a scoop of vanilla ice cream or a dollop of whipped cream. A drizzle of extra glaze, caramel sauce, or even a light dusting of cinnamon sugar just before serving makes them extra special.
- Afternoon Treat: Perfect with a mug of hot apple cider, a latte, or just on their own as a pick-me-up.
- Pairing Drinks: Hot beverages like coffee, black tea, or spiced apple cider are classic. For something cooler, try a glass of cold milk or a crisp hard cider (for adults).
Plating Tip: Arrange the glazed fritters artfully on a platter. For an extra touch, sprinkle a tiny bit of ground cinnamon or nutmeg over the glaze, or add a few thin apple slices (fresh or baked) to the side of the platter.
Storing Your Baked Apple Fritters
While these are definitely best enjoyed fresh and warm, you can store leftover baked apple fritters to savor later. Proper storage helps maintain their quality.
- Storage: Let the fritters cool completely (especially if glazed). Store them in a single layer in an airtight container at room temperature for up to 2 days. For longer storage, you can refrigerate them for up to 4-5 days. If stacking, place a layer of parchment paper between them to prevent sticking, especially if they are glazed.
- Freezing: For longer storage, you can freeze baked (and preferably unglazed) fritters. Let them cool completely, then place them in a single layer on a baking sheet to freeze until solid. Once solid, transfer them to a freezer-safe bag or container. They can be frozen for up to 2-3 months. If freezing glazed fritters, the glaze texture might change slightly upon thawing.
- Reheating:
- From room temperature/refrigerated: The best way to reheat is gently in a preheated oven or toaster oven at 300-325°F (150-160°C) for 5-10 minutes, or until warmed through. This helps crisp up the exterior slightly. The microwave works for quick reheating (30-60 seconds), but they might be softer.
- From frozen: Thaw overnight in the refrigerator or for a couple of hours at room temperature. Then reheat in the oven/toaster oven as above.
- Food Safety Note: Discard any fritters that develop mold, an off smell, or unusual texture. Always store baked goods in clean, airtight containers.
- Approximate Shelf Life: 2 days at room temperature, 4-5 days refrigerated, 2-3 months frozen.
Recipe Remix Ideas:
- Fritter Crumble: If you have leftover fritters that are a little past their prime for eating whole, crumble them over yogurt, oatmeal, or even ice cream for a delicious topping.
- Fritter French Toast Bake: Cube stale baked apple fritters and use them in place of bread in a simple French toast bake casserole. Pour custard over the cubes and bake until golden and bubbly.
Nutrition Breakdown
Here’s an estimated nutritional breakdown per serving for these baked apple fritters. Please note that this is an approximation and can vary based on the specific ingredients and brands you use, as well as the exact serving size.
- Calories: Approx. 280
- Protein: Approx. 3g
- Fat: Approx. 8g
- Saturated Fat: Approx. 4.5g
- Carbohydrates: Approx. 50g
- Sugar: Approx. 30g
- Sodium: Approx. 150mg
Disclaimer: Nutrition data is an estimate calculated using an online nutrition calculator and may vary based on ingredients and preparation methods. It is intended for informational purposes only.
Baked Apple Fritter FAQ
Got questions about making these baked apple fritters? Here are some common ones I’ve encountered or anticipate:
- Can I use different types of apples? Yes, absolutely! While I recommend baking-friendly varieties like Granny Smith, Honeycrisp, or Fuji, you can use others. Just be aware that softer apples might break down more during baking. Using a mix of sweet and tart apples gives a nice complex flavor.
- Can I add nuts or dried fruit to the batter? Yes! Chopped walnuts, pecans, or raisins would be delicious additions. Fold them in with the diced apples in step 5. About ¼ to ½ cup is a good amount.
- Can I make the batter ahead of time? I don’t recommend making the complete batter ahead of time. The baking powder and baking soda start to react once combined with the liquid, and the leavening power will diminish over time, resulting in flat fritters. You can prep the dry ingredients and dice the apples ahead of time and store them separately. Combine everything just before baking.
- Why did my baked apple fritters turn out flat? This is usually due to overmixing the batter (which develops gluten and makes them dense) or using old, inactive leavening agents (baking powder/soda). Ensure your leavening is fresh and mix the batter gently, just until combined.
- How should I store the glazed fritters? Once the glaze is set, store them in a single layer in an airtight container at room temperature for a day or two, or in the refrigerator for longer storage. Stacking them without parchment paper in between will cause the glaze to stick.
- Can I fry this batter instead of baking it? This specific batter was developed for baking. It’s quite thick and contains melted butter, which might make it absorb too much oil or not cook evenly if deep-fried. For traditional fried fritters, you’d typically use a different type of batter, often yeast-leavened or a thinner baking powder batter designed specifically for frying. I highly recommend sticking to baking for this recipe!
Enjoy Your Creation & Let’s Connect!
There you have it! A simple, reliable recipe for delicious baked apple fritters that brings all the cozy flavors you love with none of the frying fuss. I truly hope you enjoy making and sharing these as much as I do. They fill your home with the most incredible scent and provide a perfect little moment of sweet satisfaction.
I’d love to see how yours turn out! Please feel free to leave a comment below and let me know what you thought or if you made any fun variations. And if you snap a photo, share it on social media! Tag @palate_recipes on Instagram or Pinterest. It makes my day to see your kitchen creations!
What’s your favorite type of apple to bake with? Or what other classic fried treats would you love to see a baked version of?