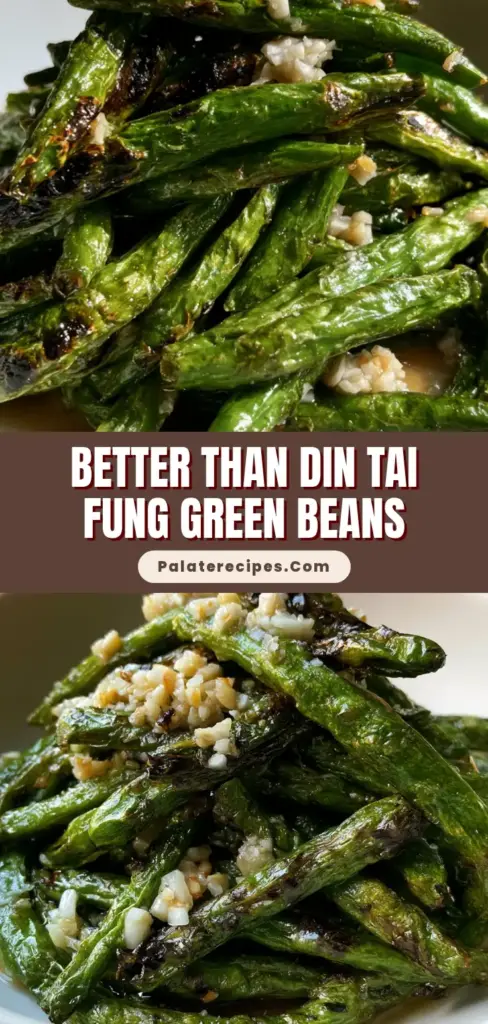
If you have been searching for that elusive, restaurant-quality side dish, these Blistered Chinese Garlic Green Beans are about to become your new weeknight obsession. There is something truly magical about the way high heat transforms a simple vegetable into a smoky, charred, and deeply savory masterpiece. This recipe mimics the traditional “dry-frying” technique used in Sichuan cooking to create that iconic wrinkled texture and intense flavor profile that keeps you reaching for just one more bite.
The beauty of Blistered Chinese Garlic Green Beans lies in the contrast: the beans are tender yet crisp, the skin is perfectly blistered and charred, and every inch is coated in a glossy translucent savory sauce. Unlike steamed beans that can feel uninspiring, these are bold, aromatic, and visually stunning. Whether you are serving them alongside a creamy lemon chicken orzo or a simple bowl of steamed rice, they bring a professional flair to any table.
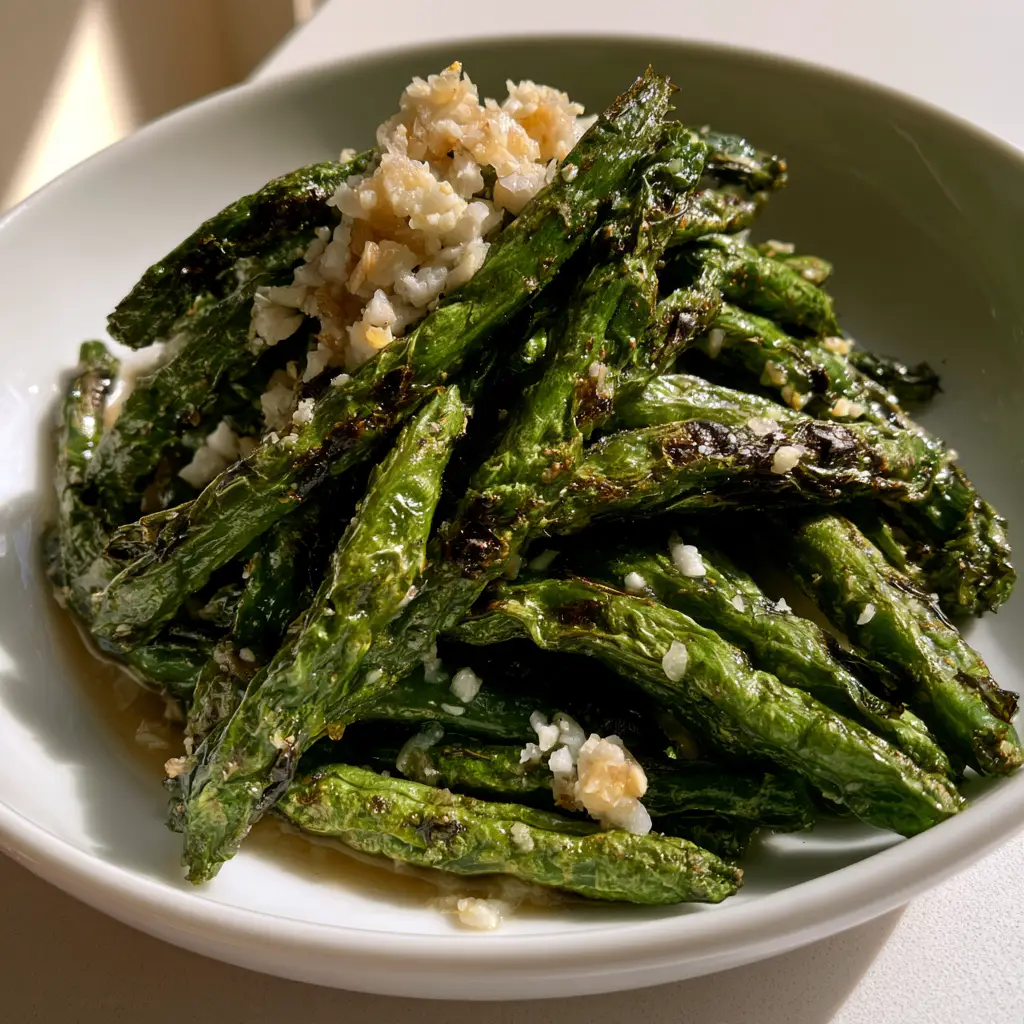
The Secret To Achieving The Perfect Charred Texture
- High-Heat Searing: We use a high smoke-point oil and a ripping hot pan to create those dark brown charred spots without overcooking the interior.
- The Wrinkle Factor: By allowing the moisture to evaporate quickly, the beans achieve a shriveled, wrinkled texture that acts as a sponge for the sauce.
- Aromatic Infusion: Generous amounts of minced softened garlic are added at the perfect moment to ensure they become fragrant and golden without burning.
- Glossy Finish: A meticulously balanced sauce provides a thin, glossy coating that highlights the vibrant green of the beans.
Essential Pantry Staples For Authentic Blistered Chinese Garlic Green Beans
To get that specific “umami” punch found in professional kitchens, each ingredient in this Blistered Chinese Garlic Green Beans recipe serves a specific culinary purpose. Do not skip the aromatics, as they are the backbone of the entire dish.
Fresh Green Beans: You want 1 lb (454g) of fresh, snappy green beans. Look for ones that are vibrant green and free of soft spots. You can use standard string beans or delicate haricots verts for a faster cook time.
Neutral High-Smoke Point Oil: Use 2 tablespoons (30ml) of avocado, grapeseed, or peanut oil. Avoid olive oil here, as it will smoke and turn bitter under the high heat required for blistering.
Fresh Garlic: This recipe calls for 6-8 cloves of finely minced white garlic. We want a “mound” of garlic that softens into the sauce, providing a sweet and savory bite in every mouthful.
Soy Sauce & Oyster Sauce: 1 tablespoon (15ml) of each creates the base of our translucent savory sauce. The oyster sauce provides the necessary body and sheen that makes the beans look professional.
Toasted Sesame Oil: Just 1 teaspoon (5ml) added at the very end provides that toasted, nutty aroma that defines great Chinese takeout.
Sugar and White Pepper: A pinch of sugar balances the salt from the soy, while white pepper adds a subtle, floral heat that is more traditional than black pepper in this application.
How To Prepare Your Kitchen For High-Heat Cooking
Step 1: The Prep and Dry Strategy
Before you even turn on the stove, ensure your green beans are bone dry. Any moisture on the surface of the beans will cause them to steam rather than blister. Use a clean kitchen towel or paper towels to pat them down thoroughly after washing and trimming the ends.
Mince your garlic as finely as possible. We want the garlic to be softened and translucent, almost melting into the sauce, rather than having large, crunchy chunks that might burn too quickly in the hot oil.
Step 2: The Searing Process (The Blister)
Place your wok or a large cast-iron skillet over high heat. Add the neutral oil and wait until you see a faint wisp of smoke. This is the “Wok Hei” moment. Carefully add the beans in a single layer if possible. Let them sit undisturbed for 2-3 minutes.
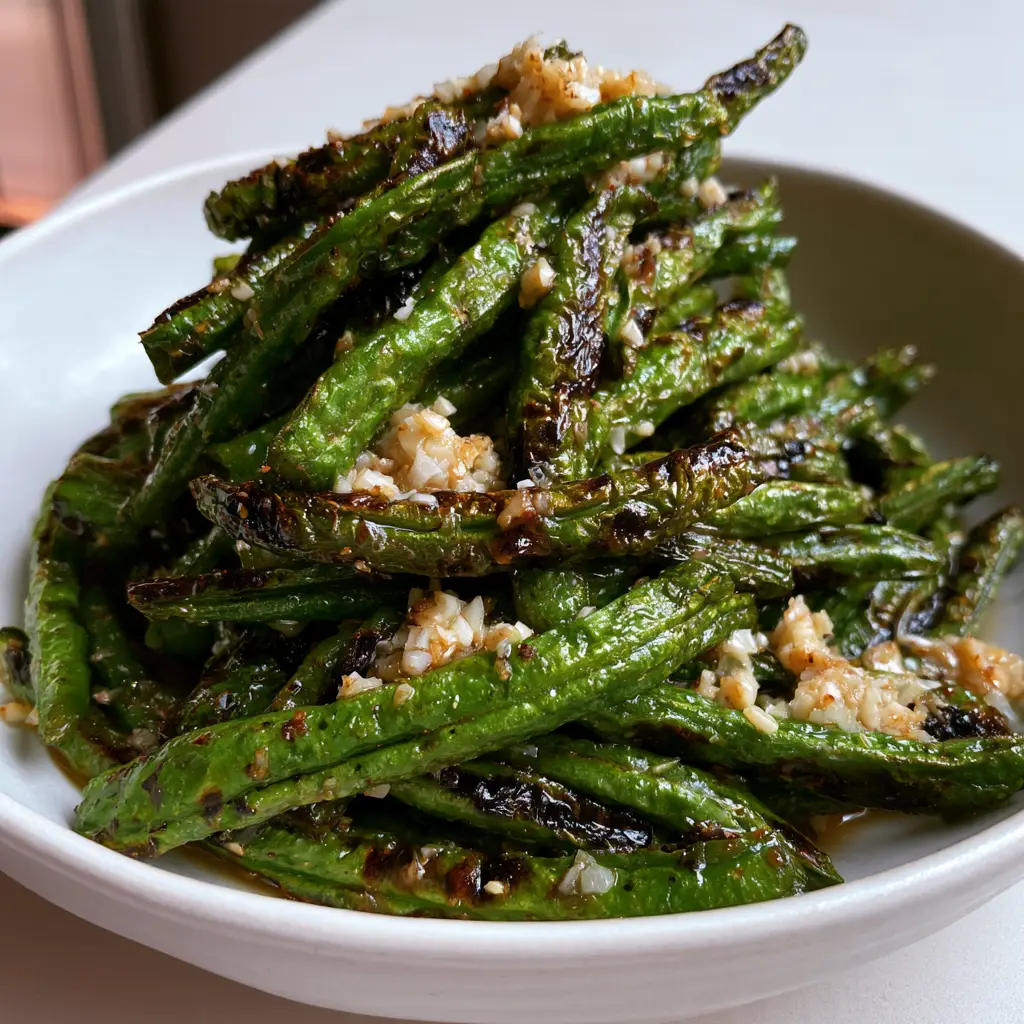
You should hear a vigorous sizzling. Use tongs to turn the beans occasionally. You are looking for the beans to develop significant dark brown charred spots and that characteristic wrinkled, shriveled texture. This usually takes 5-7 minutes of high-heat contact.
Step 3: Softening the Garlic and Glazing
Once the beans are blistered, push them to the sides of the pan, creating a well in the center. Add a tiny splash more oil if needed, and drop in your minced garlic. Stir-fry the garlic for only 30-45 seconds until it is fragrant and light golden.
Pour in your pre-mixed sauce (soy sauce, oyster sauce, and sugar). Toss everything together rapidly. The sauce will bubble and thicken almost instantly, creating a glossy translucent coating over the charred skins of the beans. Finish with a drizzle of sesame oil and remove from heat immediately.
Expert Tips For The Best Blistered Chinese Garlic Green Beans
- Don’t Crowd the Pan: If you are doubling the recipe, cook the beans in batches. Overcrowding drops the pan temperature and leads to soggy, limp beans.
- Cast Iron is King: If you don’t own a wok, a heavy cast-iron skillet is the best substitute for maintaining the high heat necessary for charring.
- The Garlic Timing: Never add the garlic at the start. It will burn and become bitter long before the beans are finished blistering.
- Salt Control: Since soy sauce and oyster sauce are naturally salty, wait until the very end to taste-test before adding any additional sea salt.
Storage, Reheating, and Make-Ahead Advice
While Blistered Chinese Garlic Green Beans are best served immediately to maintain their texture, they can be stored in an airtight container in the refrigerator for up to 3 days. They make a fantastic addition to a meal prep bowl with ground beef and rice casserole.
To reheat, avoid the microwave if possible, as it will make the beans rubbery. Instead, toss them back into a hot skillet for 2 minutes to revive the sauce’s gloss and the beans’ snap. We do not recommend freezing this dish, as the cell structure of the bean breaks down, losing that iconic “wrinkled” bite.
What To Serve With Garlic Green Beans
These beans are incredibly versatile. For a complete feast, pair them with a protein-heavy dish like baked chicken ricotta meatballs or even a hearty kielbasa and potato casserole. The bright, savory acidity of the beans cuts through rich, creamy dishes beautifully. If you’re looking for more air-fried options to round out your meal, try these air fryer sliced potatoes for a crunchier side.
Frequently Asked Questions
Frozen green beans are not recommended for blistering as they contain too much internal moisture. For the best wrinkled, charred texture, always use fresh beans.
The secret is high heat and dry beans. Ensure the pan is smoking hot and the beans are completely dry before adding them to the oil. Avoid over-stirring so they can develop a deep char.
To make this gluten-free, substitute the soy sauce for tamari and ensure your oyster sauce is labeled as gluten-free.
You can use a vegetarian mushroom sauce or a mixture of soy sauce and a little extra sugar/honey to mimic the thick, savory sweetness of oyster sauce.
Garlic burns very quickly at the high temperatures used for blistering. Only add the minced garlic at the very end when the beans are already charred, and cook it for less than 45 seconds.
The Ultimate Blistered Chinese Garlic Green Beans Recipe
Blistered Chinese Garlic Green Beans: Better Than Takeout
Ingredients
Equipment
Method
- Wash green beans and trim ends. Use a towel to pat them completely dry to ensure they blister rather than steam.
- Finely mince 6-8 cloves of garlic and set aside.
- Heat oil in a wok or skillet over high heat until smoking. Add beans and sear for 5-7 minutes, stirring occasionally, until wrinkled and charred.
- Push beans to the side, add minced garlic to the center, and cook for 30 seconds. Pour in soy sauce, oyster sauce, and sugar.
- Toss beans rapidly in the bubbling sauce for 1 minute until coated and glossy. Remove from heat and drizzle with sesame oil.
Notes
Do not add garlic too early as it burns easily at high temperatures.
Share Your Culinary Creations!
We want to see your Blistered Chinese Garlic Green Beans! Did you get those perfect charred spots? Was the garlic aroma as heavenly as we promised? Save this recipe to your Pinterest “Side Dish” board so you never lose it. If you made this, please leave a 5-star rating in the recipe card above and drop a photo in the comments below. Following Palate_Recipes on social media is the best way to keep up with our latest kitchen experiments!