Apple Cider Vinegar Braised Chicken is the ultimate comfort food for anyone who craves deep, complex flavors and succulent, fall-off-the-bone meat. This recipe transforms humble chicken thighs into a gourmet masterpiece using a technique that balances the sharp tang of cider vinegar with the mellow sweetness of caramelized onions and whole roasted garlic cloves. If you are looking for a dinner that looks like it belongs in a high-end bistro but requires only one cast-iron skillet, you have found it.
The magic of this Apple Cider Vinegar Braised Chicken lies in the contrast of textures. You get that incredibly crispy, golden-brown skin that has been perfectly seared, sitting atop a pool of rich, amber-colored translucent sauce. Unlike heavy cream-based sauces, this reduction is light yet intensely savory, cutting through the richness of the chicken. It’s a sophisticated flavor profile that is surprisingly easy to achieve at home, making it a staple for both busy weeknights and elegant Sunday suppers.
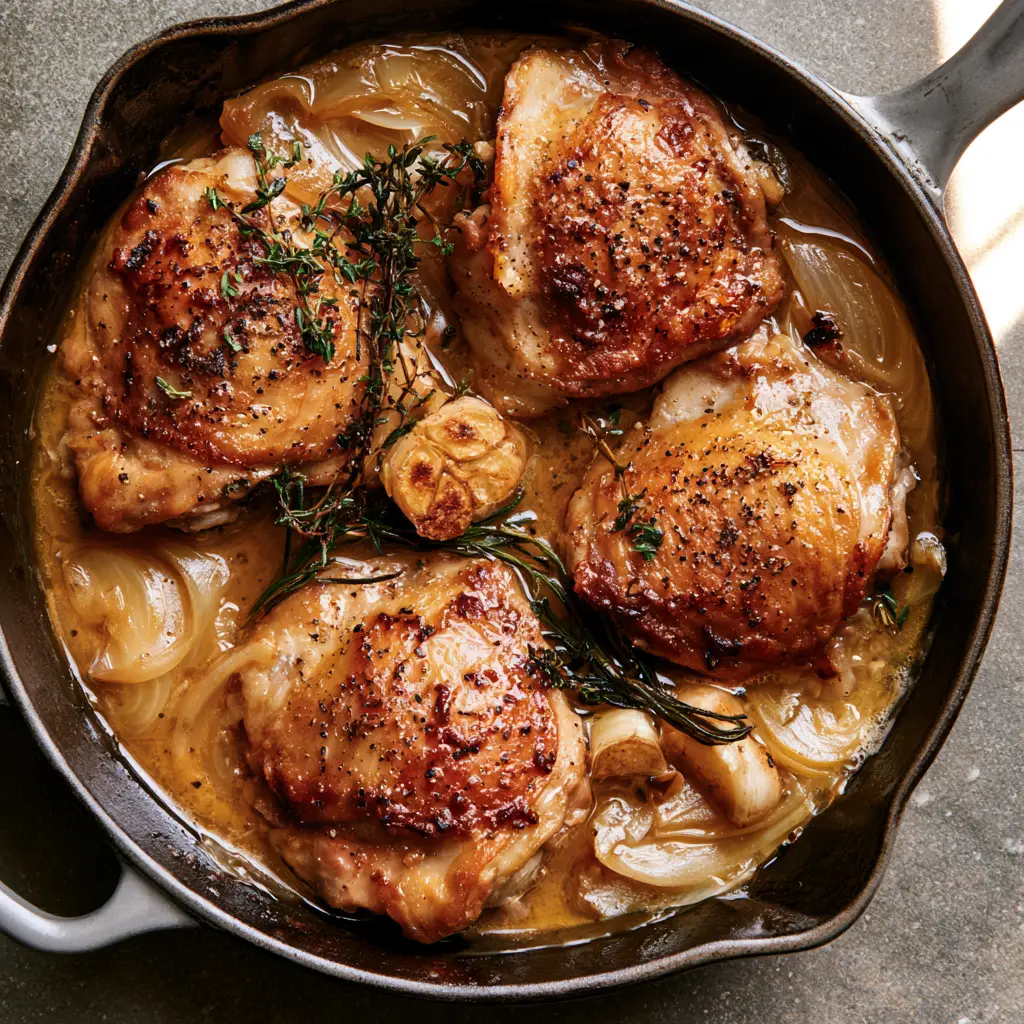
Why You Will Crave This Skillet Braised Chicken
- Perfectly Crispy Skin: By searing the bone-in, skin-on thighs first, we lock in moisture while creating a shattered-glass texture on the exterior.
- Amber Cider Reduction: The sauce is a stunning translucent amber, achieved by reducing high-quality apple cider vinegar with chicken stock and natural juices.
- Whole Roasted Garlic: We use entire cloves of garlic that soften during the braise, turning into buttery “spreads” that melt into the sauce.
- Fragrant Herb Infusion: Fresh sprigs of thyme and rosemary provide an earthy, piney aroma that perfectly complements the tartness of the vinegar.
- One-Pan Simplicity: From searing to braising, everything happens in one skillet, which means minimal cleanup and maximum flavor retention.
If you enjoy hearty, flavor-forward poultry dishes, you might also love our baked chicken ricotta meatballs or a comforting bowl of homemade chicken noodle soup. However, for a dish that offers a unique tang and sophisticated presentation, this braised chicken is unmatched.
The Essential Ingredients for a Glossy Amber Glaze
To achieve the specific look and taste of this Apple Cider Vinegar Braised Chicken, the quality of your ingredients matters. Every component in the skillet serves a culinary purpose, from building the fond to aromatics.
Bone-In, Skin-On Chicken Thighs: You need about 2 lbs (900g) of thighs. The bone keeps the meat juicy during the braising process, while the skin provides the fat needed to flavor the entire dish. Do not swap these for breasts, as they will dry out before the sauce reduces.
Apple Cider Vinegar: Use 1/2 cup (120ml) of high-quality vinegar (preferably with “the mother”). This is the star of the show, providing the acidity that tenderizes the meat and creates the signature tang.
Yellow Onions: Two large yellow onions, thinly sliced. As they braise, they become translucent and jammy, adding a natural sweetness that balances the vinegar. This is a classic technique used in many rustic European dishes, similar to the base of a stuffed cabbage soup.
Whole Garlic Cloves: One full head of garlic, peeled into whole cloves. Braising them whole prevents them from burning and allows them to become sweet and creamy rather than pungent.
Fresh Thyme and Rosemary: Use whole sprigs rather than dried herbs. The essential oils in fresh herbs withstand the braising time much better, resulting in a cleaner, more vibrant flavor.
Chicken Stock: 1 cup (240ml) of low-sodium chicken stock. This provides the volume for the braise and helps create that beautiful translucent sauce. If you want a richer flavor, you can even use the liquid base from a creamy garlic parmesan soup if you have extra on hand.
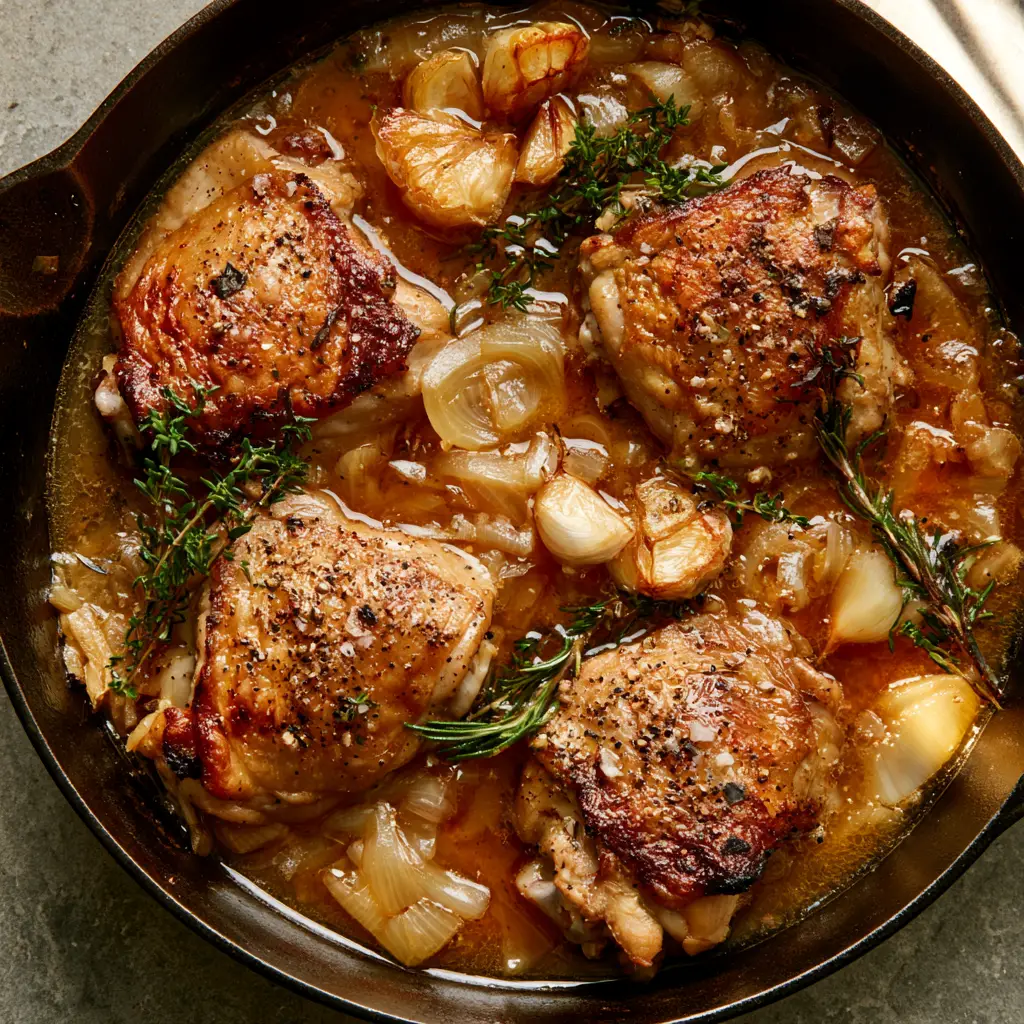
Step-by-Step Instructions for the Perfect Braise
Follow these steps carefully to ensure your chicken skin stays crispy while the meat becomes tender enough to eat with a spoon.
Step 1: The Initial Sear
Pat the chicken thighs completely dry with paper towels. Season generously with kosher salt and cracked black pepper. Heat 2 tablespoons (30ml) of neutral oil in a large cast-iron skillet over medium-high heat. Place the chicken skin-side down. Visual Cue: You are looking for a deep golden-brown, slightly charred edge. Do not move the chicken for at least 6-8 minutes. Once the skin is crispy and releases easily, flip and sear the other side for 2 minutes. Remove chicken and set aside on a plate.
Step 2: Aromatics and Deglazing
In the same skillet (keep the rendered chicken fat!), add your sliced yellow onions and whole garlic cloves. Sauté for 5-7 minutes until the onions are translucent and starting to brown at the edges. Pour in the apple cider vinegar. Use a wooden spoon to scrape up all the brown bits (the fond) from the bottom of the pan—this is where the flavor lives!
Step 3: The Braising Process
Pour in the chicken stock and add a tablespoon (15ml) of honey or maple syrup if you want an even deeper amber color. Nestled the chicken thighs back into the skillet, skin-side up. Ensure the skin remains above the liquid level so it stays crispy. Scatter fresh thyme and rosemary sprigs across the top.
Step 4: Simmer and Reduce
Reduce the heat to low, cover partially, and simmer for 25-30 minutes. Sensory Cue: The kitchen should smell bright and herbaceous. In the final 5 minutes, remove the lid and increase the heat slightly to reduce the sauce until it is a rich, amber-colored translucent glaze that coats the back of a spoon. Top with an extra dusting of cracked black pepper before serving.
Expert Tips for Braising Success
- Keep the Skin Above Water: The most common mistake is submerging the chicken. The liquid should only reach halfway up the thighs to ensure the skin remains crispy.
- Use a Cast Iron Skillet: Cast iron retains heat better than stainless steel, leading to a more even sear and a better reduction of the vinegar sauce.
- Don’t Skimp on the Pepper: The cracked black pepper isn’t just for heat; it provides a floral note that bridges the gap between the sweet onions and the acidic vinegar.
- Deglaze Thoroughly: Ensure all the caramelized bits are lifted from the pan; this is what gives the sauce its professional, dark amber hue.
Storage, Reheating, and Freezing
Apple Cider Vinegar Braised Chicken actually tastes better the next day as the flavors continue to meld. Store leftovers in an airtight container in the refrigerator for up to 4 days.
To Reheat: Place the chicken and sauce back in a skillet over medium-low heat. Add a splash of water or stock if the sauce has thickened too much. To crisp the skin again, you can pop it under the broiler for 1-2 minutes.
Freezing: You can freeze this dish for up to 3 months. However, the onions may become slightly softer upon thawing. Defrost overnight in the fridge before reheating.
What to Serve with Vinegar Braised Chicken
Because the sauce is so flavorful, you want side dishes that can soak it up. A side of crispy air fryer sliced potatoes is the perfect textural match. If you want to keep things green, try these blistered garlic green beans. For a heartier meal, serve the chicken over a bed of mashed potatoes or alongside a thick slice of homemade garbage bread to mop up every drop of that amber sauce.
Frequently Asked Questions
While apple cider vinegar gives the specific amber color and tang, you can use white wine vinegar in a pinch, though the flavor profile will be less fruity.
We recommend bone-in, skin-on thighs for the best result. Breasts tend to dry out during the 30-minute braise, whereas thighs stay juicy and flavorful.
Yes, peel the cloves but keep them whole. This allows them to soften into a buttery texture without disintegrating into the sauce.
The secret is to not submerge the chicken completely. Make sure the liquid only comes halfway up the sides of the thighs, leaving the skin exposed to the air.
Not at all. During the braising process, the vinegar reduces and the acidity mellows, while the natural sugars in the onions and stock create a balanced, savory-sweet amber sauce.
The Full Apple Cider Vinegar Braised Chicken Recipe
Apple Cider Vinegar Braised Chicken with Roasted Garlic
Ingredients
Equipment
Method
- Season chicken thighs with salt and pepper. In a cast iron skillet, heat oil over medium-high heat. Sear chicken skin-side down for 8 minutes until golden and charred. Flip and cook for 2 minutes, then remove and set aside.
- Add sliced onions and whole garlic cloves to the same skillet. Sauté until onions are translucent and garlic is fragrant, about 6 minutes.
- Pour in apple cider vinegar, scraping the bottom of the pan to release the fond. Add chicken stock and honey. Place chicken back in the pan skin-side up.
- Add herb sprigs. Simmer on low for 30 minutes until the sauce reduces to a translucent amber glaze and chicken is tender. Garnish with more cracked pepper.
Notes
Use high-quality vinegar for the best flavor balance.
Join the Palate Recipes Community!
Did you make this Apple Cider Vinegar Braised Chicken? We want to see your results! This dish is a Pinterest favorite because of its stunning amber glaze and rustic charm. Please save this recipe to your “Dinner Ideas” board and follow Palate_Recipes for more high-flavor, one-pan meals.
If you tried it, leave a comment below and share a photo of your skillet! Don’t forget to give this recipe a 5-star rating if you loved it—it helps other home cooks find our kitchen. Happy braising!