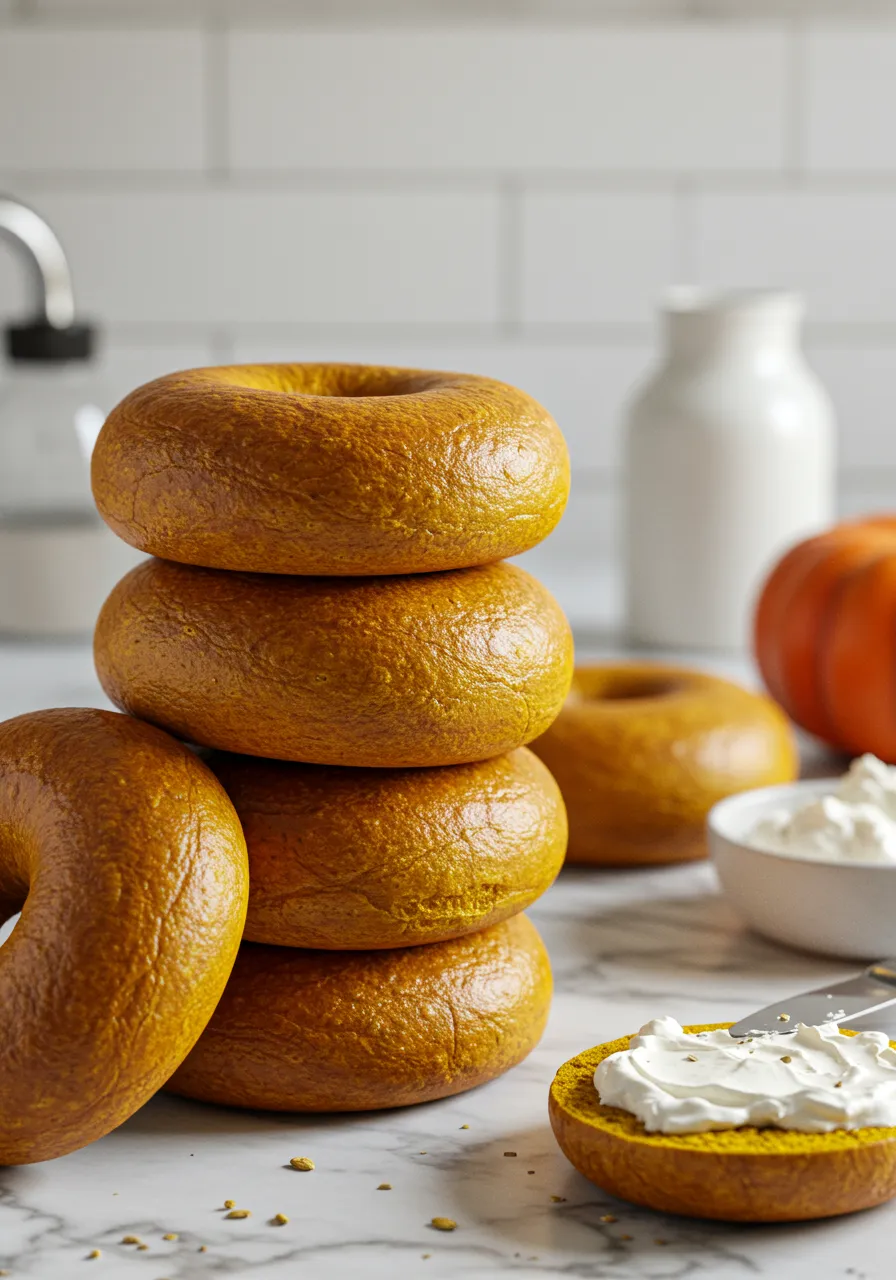
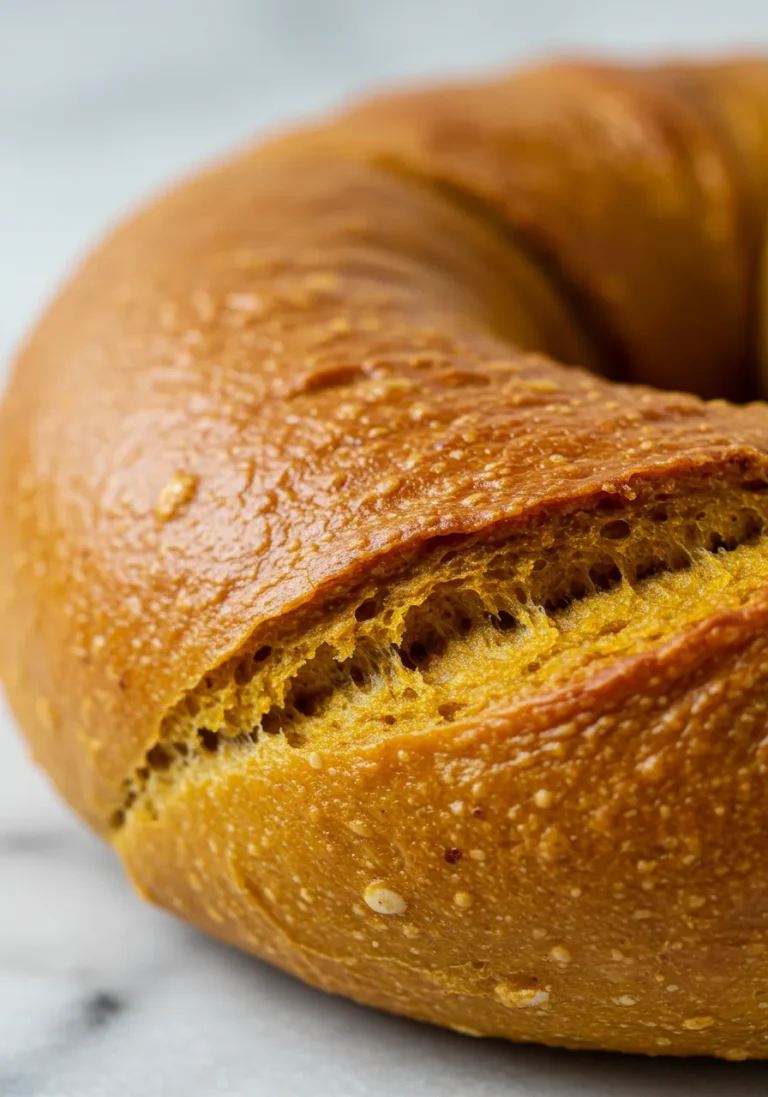
Hello there, fellow home bakers! If there’s one thing I adore about the cooler months, it’s the cozy, comforting embrace of pumpkin. And what better way to bring that warmth into your kitchen than with freshly baked homemade bagels? Forget dry, store-bought versions! My easy pumpkin bagel recipe delivers unbelievably soft interiors with that signature chewy crust, all infused with the subtle, sweet spice of pumpkin. Even if you’ve never made bagels before, I promise you can do this. It’s simpler than you think, and the result? Pure, autumnal bliss. Let’s bake some magic together!
In This Post
Why You’ll Love This Pumpkin Bagel Recipe
This isn’t just another bagel recipe; it’s your new fall baking obsession. Here’s why you’ll find yourself making these pumpkin bagels again and again:
- Amazingly Easy: While bagels seem intimidating, this recipe uses straightforward techniques perfect for beginners.
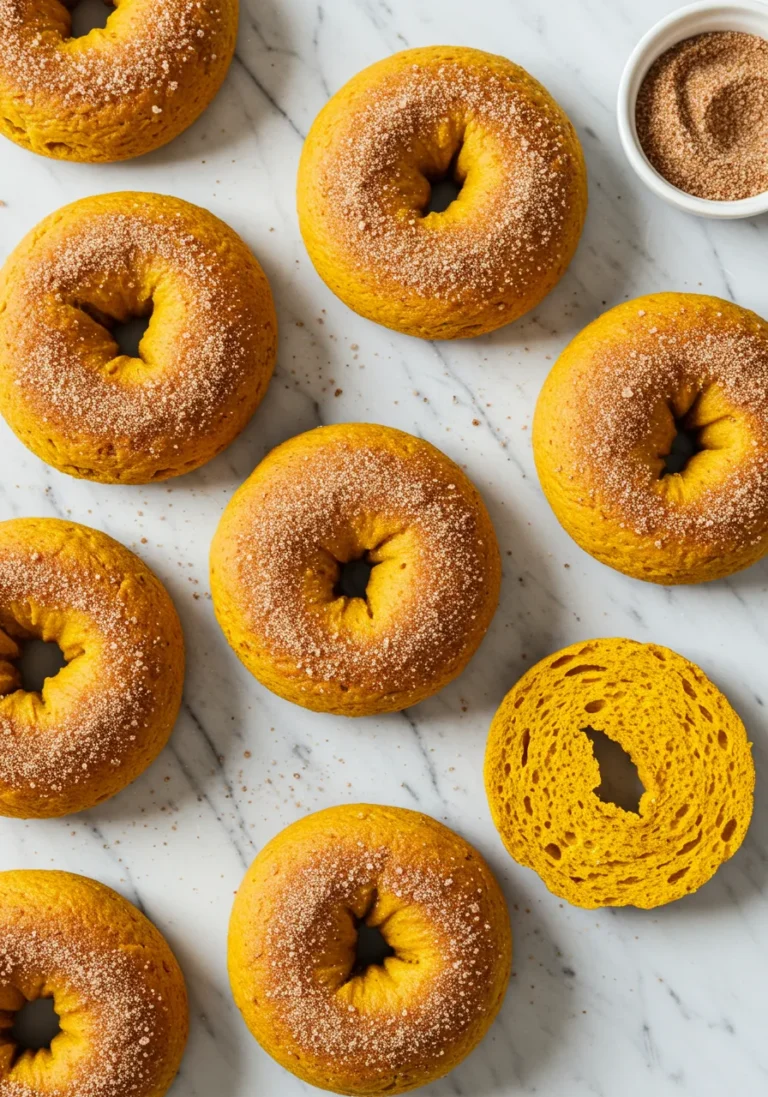
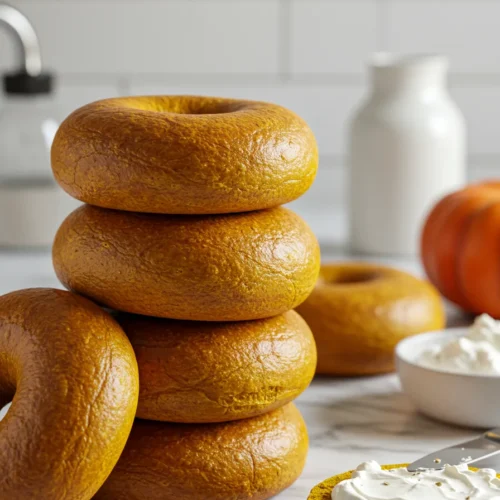
- Perfect Texture: Achieve that classic chewy exterior and soft, slightly dense interior every time.
- Warm, Spiced Flavor: The subtle addition of pumpkin and spice creates a comforting, not-overpowering, fall taste.
- Naturally Vegan-Friendly: The base dough is naturally vegan, making simple swaps easy for dietary needs.
- Uses Pantry Staples: Most ingredients are likely already in your kitchen.
- The Smell of Fall: Your home will smell absolutely incredible while these are baking!
Pumpkin Bagel Ingredients
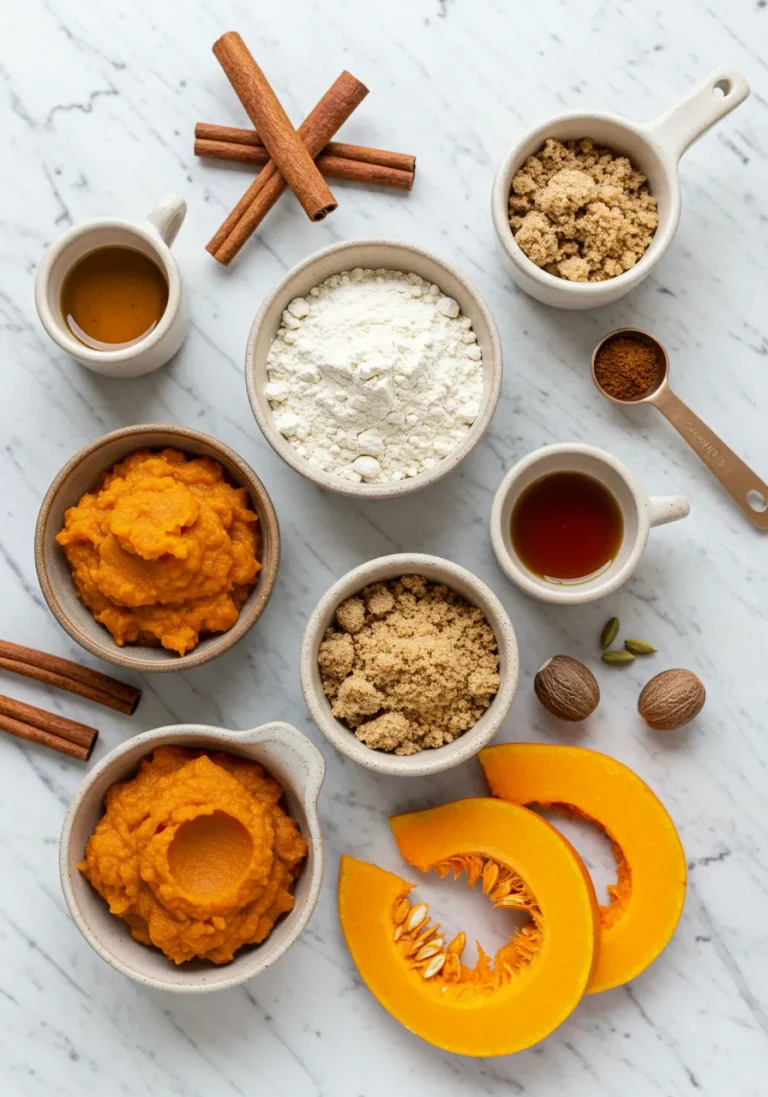
What You’ll Need
Gathering your ingredients is the first step to baking success. Precision matters in baking, so measure carefully!
- 1 ½ cups Warm Water (105-115°F / 40-46°C – warm, not hot!)
- 2 ¼ teaspoons Active Dry Yeast (one standard packet)
- 1 tablespoon Brown Sugar (packed – feeds the yeast and adds color)
- 1 teaspoon Fine Sea Salt
- 1 cup Pumpkin Puree (not pumpkin pie filling!)
- 1 tablespoon Vegetable Oil (or other neutral oil)
- 4-4 ½ cups Bread Flour (high protein flour is key for chew!)
- 1 teaspoon Pumpkin Pie Spice (or cinnamon, nutmeg, ginger mix)
- ½ teaspoon Ground Cinnamon
- 1 tablespoon Baking Soda (for the boiling water bath)
- Optional Toppings: Sesame seeds, poppy seeds, everything bagel seasoning, cinnamon sugar, toasted pumpkin seeds
Smart Swaps & Flavor Boosts
Want to tailor these pumpkin bagels? Here are a few ideas:
- Vegan: This recipe is naturally vegan! Just ensure your brown sugar is vegan-certified if that’s a concern. No animal products needed.
- Gluten-Free: Bagel texture is tricky gluten-free. While you can experiment with a good quality gluten-free bread flour blend (often requiring binders like xanthan gum), results will differ significantly from traditional bagels. This recipe is optimized for wheat flour.
- Sweeter Flavor: Increase the brown sugar in the dough by another tablespoon.
- Bolder Pumpkin Spice: Add an extra ½ teaspoon of pumpkin pie spice and ½ teaspoon of cinnamon to the dough.
- Upgrade: For a richer flavor, try using melted unsalted butter (if not vegan) instead of oil in the dough. Or, brush the boiled bagels with melted butter before adding toppings for a golden crust.
Ingredient Notes & Sourcing
A few pointers on getting the best out of your ingredients:
- Yeast: Ensure your active dry yeast is fresh. If it’s old, it won’t proof properly, and your bagels won’t rise. Check the expiration date. You can “proof” it first by mixing it with the warm water and sugar; it should get foamy within 5-10 minutes.
- Pumpkin Puree: Use 100% pumpkin puree from a can, *not* pumpkin pie filling (which has added sugar and spices).
- Bread Flour: This is important for the chewy texture. It has a higher protein content (gluten) than all-purpose flour. If you *only* have all-purpose, you can use it, but the chew won’t be as pronounced.
- Salt: Fine sea salt or table salt works well. Avoid coarse salts in the dough unless you adjust the amount.
- Storing Ingredients: Keep yeast in an airtight container in the fridge or freezer after opening. Pumpkin puree can be frozen in portions if you don’t use the whole can. Flour is best stored in a cool, dry pantry.
Essential Equipment
You don’t need a professional bakery setup for this, but a few tools make the process much smoother:
- Large Mixing Bowl: For mixing and kneading the dough. A sturdy bowl is essential.
- Measuring Cups and Spoons: Accurate measurements are key in baking.
- Kitchen Scale (Recommended): For the most consistent results, weigh your flour (4 ½ cups is roughly 540-570g depending on how you scoop). Weighing is more precise than volume measurements.
- Stand Mixer with Dough Hook (Optional but helpful): Makes kneading much easier and quicker, developing the gluten efficiently. No stand mixer? Hand mixing works too, just requires a bit more time and elbow grease (about 15-20 minutes of kneading).
- Large Pot or Dutch Oven: For boiling the bagels. Needs to be wide enough to fit a few bagels at a time.
- Slotted Spoon or Spider: To carefully lift bagels out of the boiling water.
- Baking Sheets: You’ll need 2 or 3.
- Parchment Paper or Silicone Baking Mats: Prevents sticking and makes cleanup a breeze.
Crafting Your Pumpkin Bagels: Step-by-Step
Making bagels involves a few distinct stages: mixing, kneading, rising, shaping, boiling, and baking. Don’t let the steps intimidate you; each one is manageable! This recipe takes approximately 2 hours prep time (including rise time) and 20-25 minutes cook time.
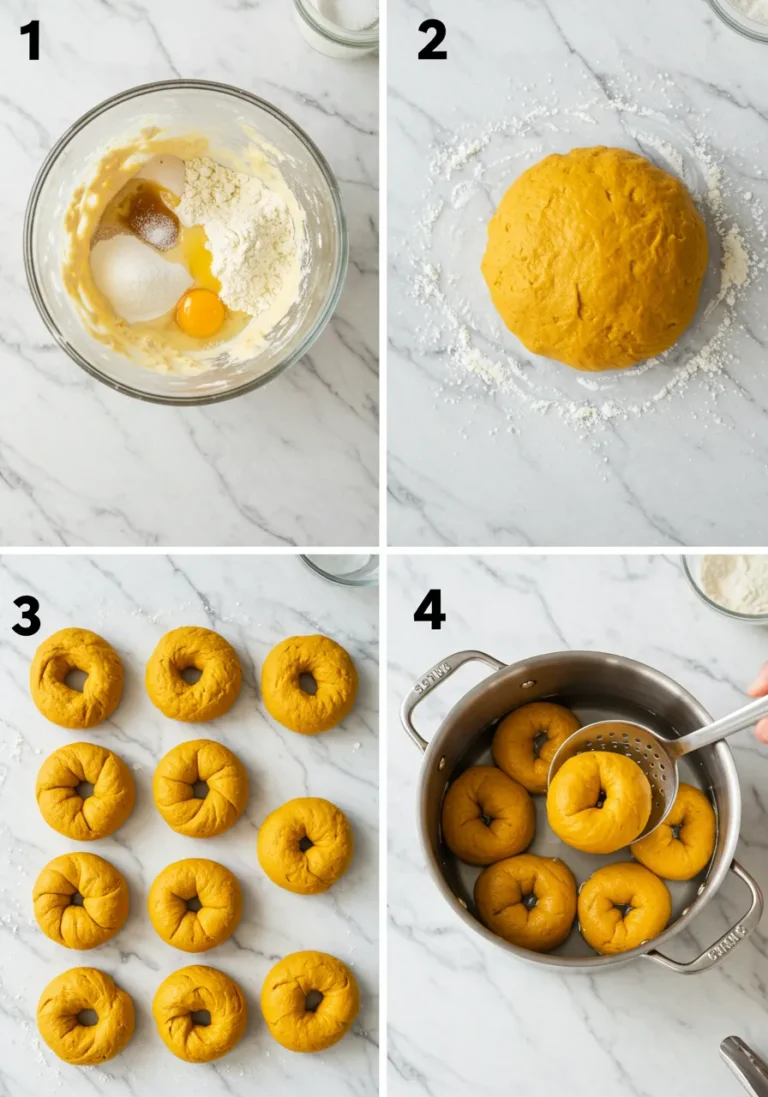
- Activate the Yeast: In your large mixing bowl (or stand mixer bowl), combine the warm water, active dry yeast, and brown sugar. Give it a gentle stir. Let stand for 5-10 minutes until the mixture is foamy. This confirms your yeast is alive and active!
- Add Wet Ingredients: Stir in the salt, pumpkin puree, vegetable oil, pumpkin pie spice, and cinnamon into the foamy yeast mixture. Mix until well combined.
- Add Flour Gradually: Add 3 cups of the bread flour and the spice mix to the wet ingredients. If using a stand mixer, attach the dough hook. Mix on low speed (or stir with a sturdy spoon) until a shaggy dough forms.
- Knead the Dough: Gradually add the remaining flour, ¼ cup at a time, mixing (or kneading by hand) until the dough pulls away from the sides of the bowl and forms a relatively smooth ball. The dough should be stiff but slightly tacky. You might not need all the flour, or you might need a tiny bit more – humidity affects flour absorption. Knead for 8-10 minutes in a stand mixer on medium-low speed, or 15-20 minutes by hand on a lightly floured surface, until the dough is elastic and smooth. It should spring back slowly when you poke it.
- First Rise: Lightly oil your mixing bowl. Place the dough ball in the bowl, turning to coat. Cover the bowl tightly with plastic wrap or a damp kitchen towel. Let rise in a warm place for 60-90 minutes, or until roughly doubled in size. The pumpkin makes this dough rise a bit slower than plain dough, so be patient!
- Shape the Bagels: Punch down the risen dough gently to release air. Turn the dough out onto a lightly floured surface. Divide the dough into 8-12 equal pieces (depending on how large you want your bagels). For consistent size, you can weigh the pieces (around 100-120g each). Shape each piece into a smooth ball. To form the bagel shape, you have two options:
- Poke Method: Poke a hole in the center of each ball with your thumb and gently stretch it out to about 1.5 – 2 inches in diameter, maintaining an even thickness.
- Rope Method: Roll the dough ball into a rope about 8-10 inches long. Flatten one end, wrap the rope around your hand, and overlap the flattened end with the other end. Pinch and roll the seam firmly to seal the ring shape.
Place shaped bagels on the prepared baking sheets lined with parchment paper, leaving some space between them.
- Rest (Optional but Recommended): For a chewier texture, cover the shaped bagels lightly with plastic wrap and refrigerate for at least 30 minutes, or up to 24 hours. This slow cold fermentation develops more flavor and texture. If you’re in a hurry, you can skip this cold rest, but they will be slightly less chewy.
- Boil the Bagels: While the bagels are chilling (or resting briefly), preheat your oven to 425°F (220°C). Bring a large pot of water to a rolling boil. Add the baking soda to the boiling water – this is crucial for that signature chewy crust! Gently lower 2-3 bagels into the boiling water using a slotted spoon. Don’t overcrowd the pot. Boil for 60 seconds per side (2 minutes total per bagel). The bagels will puff up slightly and look a little shiny.
- Drain & Top: Carefully remove the boiled bagels with the slotted spoon, letting excess water drain off. Return them to the parchment-lined baking sheets. If adding toppings (sesame, poppy, etc.), sprinkle them generously on the still-wet surface of the boiled bagels immediately after removing them from the water.
- Bake the Bagels: Bake in the preheated oven for 18-25 minutes, rotating the baking sheets halfway through, until the bagels are deep golden brown and feel firm. Baking time will vary depending on your oven and bagel size.
- Cool: Transfer the baked bagels to a wire rack to cool completely before slicing and serving. Slicing a hot bagel can compress the interior.
Ensuring Perfection: Pro Tips & Troubleshooting
Bagel making has a few nuances, but mastering them is easy with a little know-how.
- The Secret to Bagel Chew: The combination of high-protein bread flour, kneading time (to develop gluten), the cold rest (for fermentation and texture), and the boiling step (which sets the outer layer before baking) are what create that perfect chewy texture. Don’t skip or rush these steps if you want classic bagels!
- Common Pitfalls & How to Sidestep Them:
- Bagels are Flat: Yeast wasn’t active (check the date!), water wasn’t warm enough, or dough wasn’t kneaded enough. Ensure your yeast foams in step 1 and knead until the dough is smooth and elastic.
- Bagels are Tough/Hard: Over-kneading can sometimes cause this, or adding too much flour. Make sure your dough is slightly tacky but not sticky after kneading.
- Hole Disappears While Baking: Stretch the hole a bit wider than you think you need it before the cold rest. The dough will expand. A 1.5-2 inch hole is a good starting point.
- Toppings Won’t Stick: Make sure you add toppings immediately after boiling while the surface is still wet and slightly sticky.
- Technique Spotlight: The Boil! The baking soda bath is magical. The alkaline water gelatinizes the starch on the surface of the bagel dough, creating that shiny, slightly tough skin that holds the shape during baking and contributes significantly to the chewy crust. Don’t use less baking soda than specified.
- Prep Efficiency: Make the dough the day before and let it cold ferment in the fridge overnight. This saves time on baking day and improves flavor. Shape and boil/bake in the morning!
Variations & Creative Twists
Once you’ve mastered the basic pumpkin bagel, the fun really begins!
- Spice It Up/Down:
- Less Spice: Reduce or omit the cinnamon and pumpkin pie spice for a more subtle pumpkin flavor.
- More Spice: Increase the spices, or add a pinch of ground cloves or cardamom for extra warmth.
- Gourmet Twists:
- Chocolate Chip Pumpkin Bagels: Fold in ½ – ¾ cup of mini chocolate chips during the last minute of kneading.
- Savory Pumpkin Bagels: Omit the brown sugar and spices in the dough. Add black pepper, sage, or a pinch of cayenne. Top with melted cheese or herbs after boiling and before baking.
- Nutty Pumpkin Bagels: Add ½ cup finely chopped toasted pecans or walnuts to the dough.
- Simplify It:
- No Knead (Different Texture): While not ideal for classic chew, you *can* adapt this to a no-knead method using a very wet dough and fridge fermentation, but the texture will be more bread-like than traditional bagels. For classic chew, kneading is key.
- Seasonal Swaps:
- Sweet Potato Bagels: Substitute mashed cooked sweet potato or butternut squash puree for the pumpkin puree.
Printable Recipe Card
Easy Pumpkin Bagel Recipe – Soft & Chewy
Equipment
- 1 Large Mixing Bowl
- 1 Measuring Cups and Spoons
- 1 Kitchen Scale Recommended for accuracy
- 1 Stand Mixer with Dough Hook Optional, can hand mix
- 1 Large Pot or Dutch Oven For boiling
- 1 Slotted Spoon or Spider For lifting bagels
- 2 Baking Sheets
- 1 Parchment Paper or Silicone Mats
Ingredients
- 1 ½ cup Warm Water 105-115°F / 40-46°C
- 2 ¼ teaspoon Active Dry Yeast one standard packet
- 1 tablespoon Brown Sugar packed
- 1 teaspoon Fine Sea Salt
- 1 cup Pumpkin Puree not pie filling
- 1 tablespoon Vegetable Oil or neutral oil
- 4-4 ½ cup Bread Flour
- 1 teaspoon Pumpkin Pie Spice
- ½ teaspoon Ground Cinnamon
- 1 tablespoon Baking Soda for boiling water bath
- Optional Toppings sesame seeds, poppy seeds, etc.
Instructions
- In your large mixing bowl (or stand mixer bowl), combine the warm water, active dry yeast, and brown sugar. Give it a gentle stir. Let stand for 5-10 minutes until the mixture is foamy. This confirms your yeast is alive and active!
- Stir in the salt, pumpkin puree, vegetable oil, pumpkin pie spice, and cinnamon into the foamy yeast mixture. Mix until well combined.
- Add 3 cups of the bread flour and the spice mix to the wet ingredients. If using a stand mixer, attach the dough hook. Mix on low speed (or stir with a sturdy spoon) until a shaggy dough forms.
- Gradually add the remaining flour, ¼ cup at a time, mixing (or kneading by hand) until the dough pulls away from the sides of the bowl and forms a relatively smooth ball. The dough should be stiff but slightly tacky. You might not need all the flour, or you might need a tiny bit more – humidity affects flour absorption. Knead for 8-10 minutes in a stand mixer on medium-low speed, or 15-20 minutes by hand on a lightly floured surface, until the dough is elastic and smooth. It should spring back slowly when you poke it.
- Lightly oil your mixing bowl. Place the dough ball in the bowl, turning to coat. Cover the bowl tightly with plastic wrap or a damp kitchen towel. Let rise in a warm place for 60-90 minutes, or until roughly doubled in size. The pumpkin makes this dough rise a bit slower than plain dough, so be patient!
- Punch down the risen dough gently to release air. Turn the dough out onto a lightly floured surface. Divide the dough into 8-12 equal pieces (depending on how large you want your bagels). For consistent size, you can weigh the pieces (around 100-120g each). Shape each piece into a smooth ball. To form the bagel shape, you have two options:
- Poke Method: Poke a hole in the center of each ball with your thumb and gently stretch it out to about 1.5 – 2 inches in diameter, maintaining an even thickness.
- Rope Method: Roll the dough ball into a rope about 8-10 inches long. Flatten one end, wrap the rope around your hand, and overlap the flattened end with the other end. Pinch and roll the seam firmly to seal the ring shape.
- For a chewier texture, cover the shaped bagels lightly with plastic wrap and refrigerate for at least 30 minutes, or up to 24 hours. This slow cold fermentation develops more flavor and texture. If you’re in a hurry, you can skip this cold rest, but they will be slightly less chewy.
- While the bagels are chilling (or resting briefly), preheat your oven to 425°F (220°C). Bring a large pot of water to a rolling boil. Add the baking soda to the boiling water – this is crucial for that signature chewy crust! Gently lower 2-3 bagels into the boiling water using a slotted spoon. Don’t overcrowd the pot. Boil for 60 seconds per side (2 minutes total per bagel). The bagels will puff up slightly and look a little shiny.
- Carefully remove the boiled bagels with the slotted spoon, letting excess water drain off. Return them to the parchment-lined baking sheets. If adding toppings (sesame, poppy, etc.), sprinkle them generously on the still-wet surface of the boiled bagels immediately after removing them from the water.
- Bake in the preheated oven for 18-25 minutes, rotating the baking sheets halfway through, until the bagels are deep golden brown and feel firm. Baking time will vary depending on your oven and bagel size.
- Transfer the baked bagels to a wire rack to cool completely before slicing and serving. Slicing a hot bagel can compress the interior.
Notes
Serving & Pairing Suggestions
Fresh, warm pumpkin bagels are a treat on their own, but here are some ideas to elevate the experience:
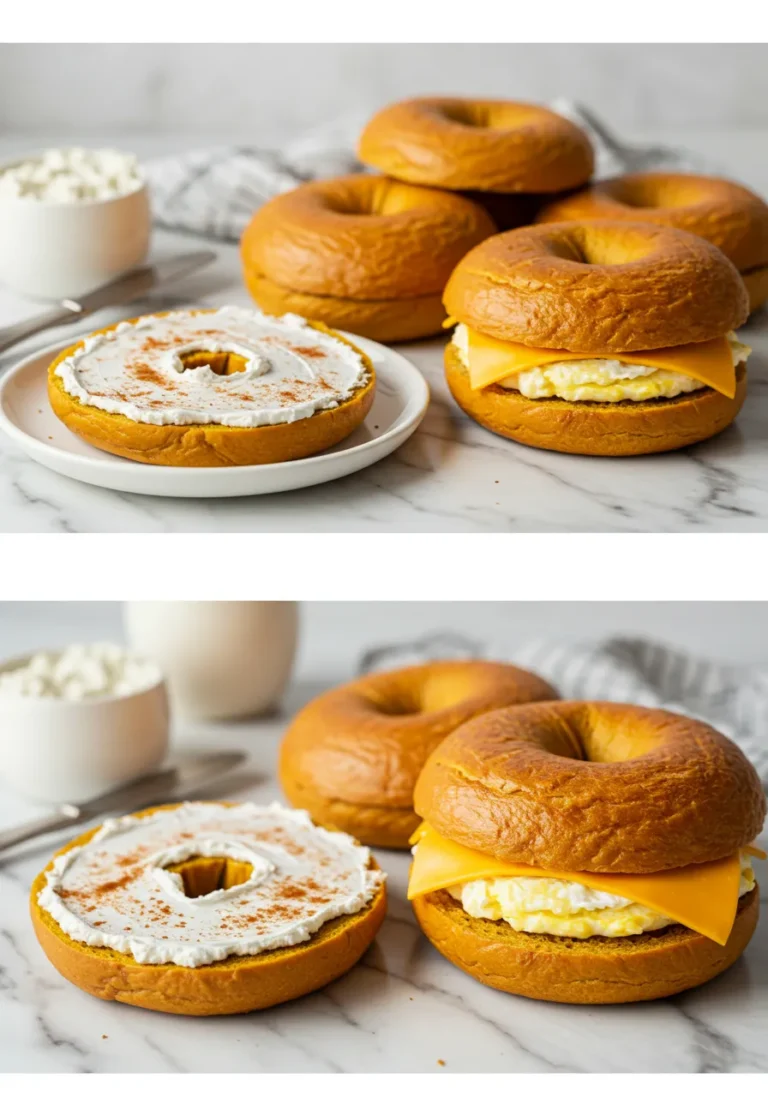
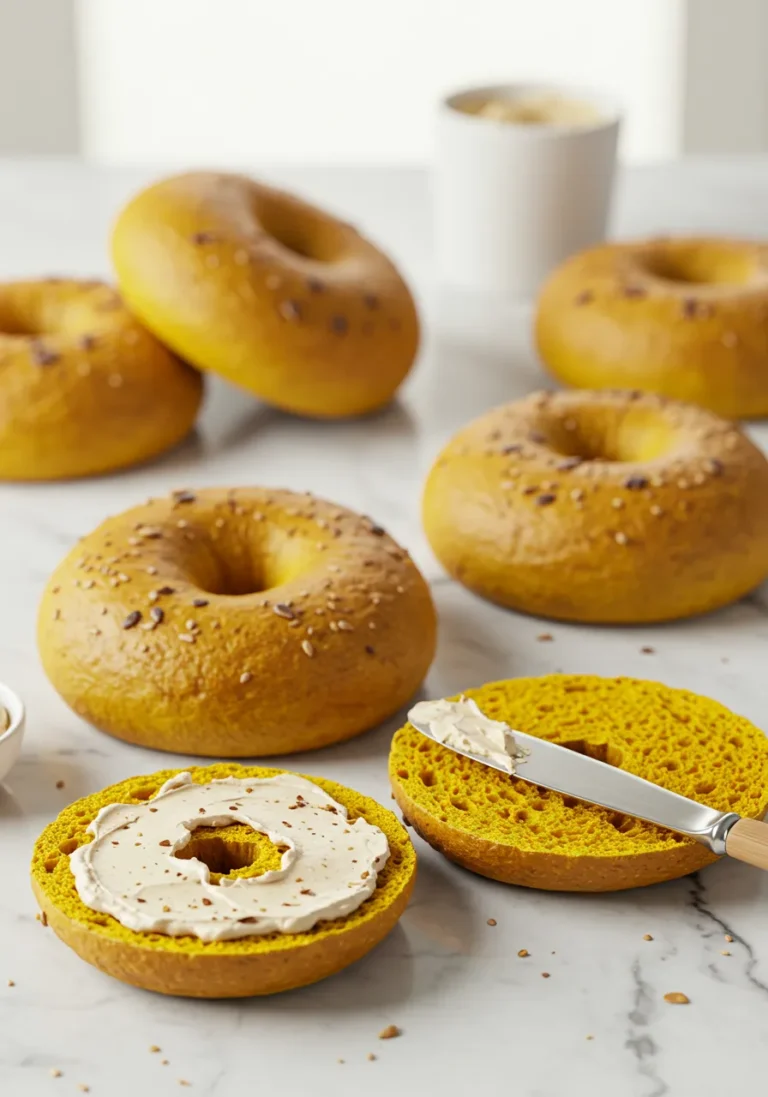
- Classic Cream Cheese: Absolutely essential! Plain cream cheese, maple cream cheese, or cinnamon-sugar cream cheese are all fantastic. A schmear provides a creamy contrast to the chewy bagel.
- Nut Butter & Honey: A comforting and simple pairing.
- Breakfast Sandwich: Use them as the base for a fall-inspired breakfast sandwich with eggs, spinach, and perhaps a slice of cheddar or smoked gouda.
- Sweet Treat: Slice, toast, and top with a dollop of whipped cream and a sprinkle of cinnamon for a dessert-like experience.
- Pair with: A hot cup of coffee or tea, a glass of cold milk, or even a mug of spiced apple cider.
- Plating Tip: Serve sliced warm bagels on a simple platter with a variety of spreads in small bowls so guests can customize their toppings. Sprinkle toppings like toasted pumpkin seeds or cinnamon sugar over the cream cheese for extra flair.
Storing Your Pumpkin Bagels
Once cooled, your homemade pumpkin bagels are best enjoyed fresh, but they can be stored:
- At Room Temperature: Store in a paper bag or a loosely sealed plastic bag for 1-2 days. A tight seal can make them gummy.
- Refrigeration: Bagels tend to dry out quickly in the fridge, so it’s not ideal unless you plan to toast them soon after. They’ll keep for about 3-4 days this way.
- Freezing (Best Method for Longer Storage): Once completely cooled, slice the bagels in half horizontally (if desired for easier toasting later). Wrap each bagel (or sliced halves) tightly in plastic wrap, then place in a freezer-safe bag or container. They will keep in the freezer for up to 3 months.
- Reheating:
- From Room Temp/Fridge: Toast them! A toaster or toaster oven works best.
- From Freezer: You can toast frozen sliced bagels directly from the freezer, adding a minute or two to the usual toasting time. Alternatively, thaw at room temperature for an hour, then toast.
- Food Safety: Discard bagels if you see any signs of mold or if they develop an off smell.
- Recipe Remix Ideas:
- Bagel Croutons: Cube stale pumpkin bagels, toss with oil and spices (like cinnamon sugar or savory herbs), and bake until crispy for delicious salad croutons.
- Pumpkin Bagel Bread Pudding: Use cubed stale bagels as the base for a rich, fall-spiced bread pudding.
Nutrition Breakdown
Here is an estimated nutritional breakdown per serving (based on 10 bagels per batch, without toppings):
- Calories: 350 kcal
- Protein: 12g
- Fat: 3g
- Saturated Fat: 0.5g
- Carbohydrates: 70g
- Sugar: 7g
- Sodium: 300mg
Disclaimer: Nutrition data is an estimate calculated using online tools and may vary based on specific ingredients used (brands, type of flour, amount of sugar/salt added), and preparation methods. It is provided for informational purposes only and is not a substitute for professional nutritional advice.
Pumpkin Bagel Recipe FAQ
Got questions? Here are some common ones about making pumpkin bagels at home:
- Can I use pumpkin pie filling instead of puree? No, absolutely not. Pumpkin pie filling has added sugar, spices, and thickeners that will mess up the dough’s structure and hydration. Use only 100% pure pumpkin puree.
- My dough isn’t rising. What went wrong? The most common culprit is inactive or dead yeast. Ensure your yeast is fresh, the water temperature is correct (warm, not hot or cold), and your rising spot is warm. Also, make sure your salt hasn’t come into direct contact with the yeast before mixing, as salt can kill yeast.
- Why do I need to boil the bagels? Can I skip it? Boiling is essential for the classic bagel texture! It sets the outer crust, creating that slight chewiness. Skipping the boil will result in a softer, more bread-like roll rather than a true bagel. Don’t skip this step!
- Can I make the dough ahead of time? Yes! The cold fermentation step (refrigerating shaped bagels) can be extended up to 24 hours. You can also mix the dough and let it do its first rise in the fridge overnight (8-12 hours) before shaping, boiling, and baking.
- How should I store leftover pumpkin puree? Unused canned pumpkin puree can be frozen. Transfer it to an airtight container or freezer bag and it will last for several months. Thaw in the fridge before using.
- What’s the best way to slice a bagel? Use a sharp serrated knife! Be careful and slice horizontally through the center.
Enjoy Your Creation & Let’s Connect!
There’s nothing quite like pulling a batch of warm, perfectly chewy pumpkin bagels out of your own oven. The aroma alone is worth the effort! I hope you find the process as rewarding as I do and that this recipe helps you feel confident in your baking skills. Remember, simple steps lead to delicious results you can trust!
I can’t wait to see your beautiful pumpkin bagel creations! Please leave a comment below and let me know how it went, or if you have any questions. Your feedback helps other bakers!
Want to share your homemade bagels with the world? Tag me on social media! Find me on Instagram and Pinterest. Use #PalateRecipes and #PumpkinBagels so I can see and share your masterpieces!
Happy Baking!
What’s your favorite way to enjoy a warm pumpkin bagel? Sweet or savory?
Have you tried making bagels at home before?