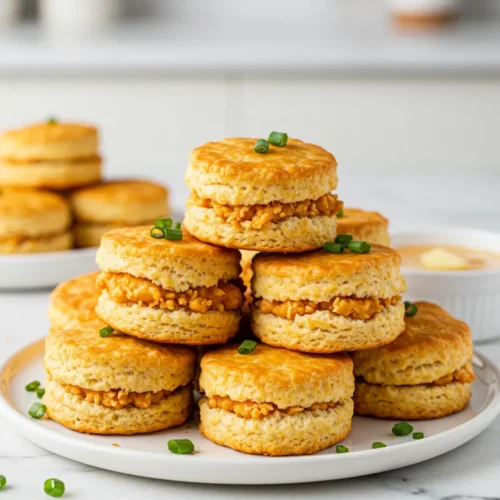
Easy & Delicious Chicken Minis Recipe - Perfect for Breakfast & Snacking
Making your own chicken minis at home is surprisingly simple, incredibly rewarding, and tastes even better because you made them with love! If you’ve ever craved that specific bite, but wanted the convenience and satisfaction of homemade, this easy recipe is for you. We'll break it down step-by-step, making it totally achievable for anyone.
Equipment
- 2 Mixing Bowls At least two needed
- Measuring Cups and Spoons
- Sharp Knife
- Cutting Board
- Baking Sheet
- Wire Rack Optional but recommended
- Dutch Oven or Heavy-Bottomed Pot For frying, or Air Fryer
- Thermometer Candy/Oil or Instant-Read, for frying
- Slotted Spoon or Spider Skimmer
- Small Saucepan or Microwave-Safe Bowl For the glaze
- Pastry Brush Optional, for glaze
Ingredients
- 1 pound Boneless, skinless chicken breasts or thighs cut into 1-inch pieces OR 1 pound Frozen popcorn chicken or chicken nuggets
- 1 cup Buttermilk or milk with 1 tbsp lemon juice/vinegar
- 1 cup All-purpose flour
- 2 tsp Smoked paprika for warmth and color
- 1 tsp Garlic powder
- 1 tsp Onion powder
- 1 tsp Salt fine sea salt is great here
- 1/2 tsp Black pepper
- 3-4 cups Vegetable oil or canola oil for frying (amount needed may vary) OR cooking spray/light oil for baking/air frying
- 1 Refrigerated biscuit dough (16.3 oz) can, specifically the small, layered ones if possible, or cut larger biscuits into smaller portions OR ingredients for your favorite small homemade biscuit recipe
- 1/2 cup Unsalted butter melted
- 2 tbsp Honey or maple syrup adjust to your sweetness preference
Instructions
- Prep the Chicken (Choose Your Method):
- If using chicken breasts/thighs: Cut the chicken into roughly 1-inch pieces. Place the chicken in a bowl and pour the buttermilk over it. Stir to coat, cover, and refrigerate for at least 30 minutes (or up to 4 hours) to tenderize. In a separate shallow dish, whisk together the flour, smoked paprika, garlic powder, onion powder, salt, and pepper.
- If using frozen popcorn chicken/nuggets: Follow the package directions for cooking, but aim for slightly less cook time than recommended initially, as they'll be reheated during assembly. You can bake, air fry, or even lightly fry these according to package instructions.
- Prepare for Cooking Chicken (If making from scratch): If frying, pour about 3-4 inches of vegetable oil into your Dutch oven or heavy pot. Heat over medium-high heat until the oil reaches 350-375°F (175-190°C). If baking or air frying, preheat your oven or air fryer according to package directions (usually around 400°F or 200°C) and lightly grease the cooking surface.
- Coat the Chicken (If making from scratch): Remove chicken pieces from the buttermilk, letting excess drip off slightly. Dredge each piece thoroughly in the seasoned flour, pressing gently to coat. For extra crispiness, you can dip it back into the buttermilk briefly and then into the flour again for a double coat. Place coated chicken pieces on a wire rack while you finish coating.
- Cook the Chicken:
- To Fry: Carefully add coated chicken pieces to the hot oil in batches. Do not overcrowd the pot, as this lowers the oil temperature and results in greasy chicken. Fry for 4-6 minutes, flipping halfway through, until golden brown and cooked through (internal temperature of 165°F or 74°C). Remove with a slotted spoon and place on a wire rack set over a baking sheet to drain excess oil.
- To Bake: Arrange coated chicken pieces or frozen pieces in a single layer on your prepared baking sheet or in the air fryer basket. Bake or air fry for 10-15 minutes (or according to package for frozen), flipping halfway, until golden brown and cooked through.
- Bake the Biscuits: While the chicken cooks (or immediately after), arrange the refrigerated biscuits on a baking sheet lined with parchment paper. If using larger biscuits, cut them into quarters or appropriately sized pieces. Bake according to package directions (usually 10-15 minutes at 350-375°F or 175-190°C), until puffed and golden brown. Let them cool slightly on a wire rack.
- Make the Glaze: While the biscuits are still warm, melt the butter in a small saucepan or microwave-safe bowl. Stir in the honey or maple syrup until well combined.
- Assemble the Minis: Carefully slice each biscuit in half horizontally. Place a cooked chicken piece on the bottom half of each biscuit. Drizzle or brush the warm honey-butter glaze over the chicken and the inside of the top biscuit half. Place the top half of the biscuit onto the chicken.
- Serve: Arrange the warm chicken minis on a platter and serve immediately.
Notes
Pro Tips: Ensure frying oil is at the correct temperature (350-375°F) and fry in batches for crispy chicken. Don't overbake biscuits – they should be golden brown. Apply the warm glaze right after slicing the biscuits and cooking the chicken. For extra crispiness, double-dredge the chicken in buttermilk and flour.
Common Pitfalls: Soggy chicken (oil not hot enough, overcrowding) - fix by monitoring temp and cooking in batches. Hard biscuits (overbaking) - stick to recommended time/temp. Glaze not sticking (biscuits/chicken cool) - apply while warm.
Storage: Store cooled, assembled minis in an airtight container in the fridge for 3-4 days. Store components separately for best texture. Cooked chicken can be frozen for 2-3 months.
Reheating: Reheat in oven or air fryer at 350°F for 5-10 mins for best results. Microwave is quicker but yields softer texture.
Food Safety: Reheat leftovers to 165°F.